How to Use the Battering Ram in Valheim
Master the use of the battering ram in Valheim to enhance your siege strategies. Learn effective tactics and tips to conquer your enemies. Read more!

Shahrukh Sial is a Gaming Content Strategist at Sparked Host. He identifies his own strategic outlines through deep research to cover game guides, tips, and updates that help players improve their skills and enjoy a better gaming experience.
If you’re searching for how to use the battering ram in Valheim, this comprehensive guide is for you. Here, you’ll find everything you need to know about building, fueling, positioning, and operating the battering ram—one of the most essential siege engines for endgame players tackling the Ashlands and Charred Fortresses.
This guide is specifically tailored for endgame and Ashlands players who need to master siege tactics to progress through Valheim’s toughest fortifications. Mastering the battering ram is crucial for breaking through heavily reinforced enemy walls, advancing into new areas, and efficiently gathering resources or demolishing structures. We’ll cover the full scope: from construction and fueling, to strategic placement, team operation, troubleshooting, and advanced tips for maximizing your siege success.
What is the Battering Ram?
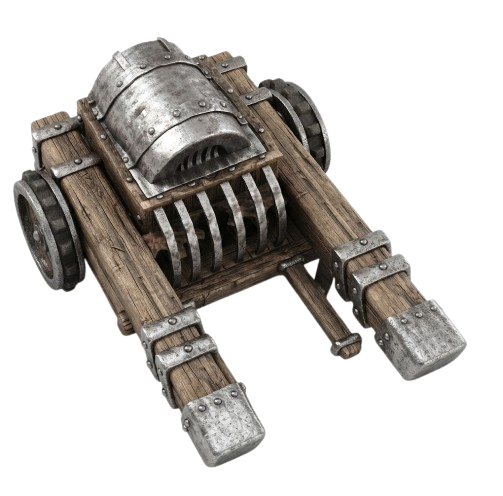
The battering ram is a siege engine used to breach Charred Fortresses in Valheim. Its primary purpose is to destroy heavily reinforced Ashlands structures and fortress gates, making it a key tool for progressing through late-game content.
Battering Ram Basics
Siege Engine Functionality
- Purpose: The battering ram is a siege engine used to breach Charred Fortresses in Valheim. It is designed exclusively to destroy heavily reinforced Ashlands structures and fortress gates.
Required Components
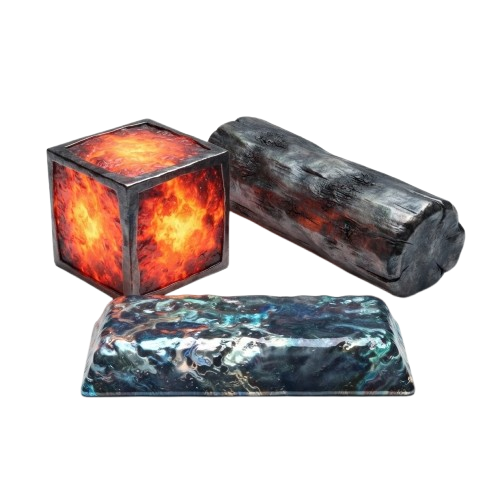
- Materials Needed: Built using Blackwood, Ashwood, and Flammetal.
Crafting Station
- Station Requirement: Must be placed within the radius of a Black Forge.
Unlocking Blueprints
- How to Unlock: Blueprints are acquired automatically upon gathering Ashlands-tier materials and upgrading the Black Forge.
Once you understand the basics, it's important to prepare properly before using the battering ram.
Preparing to Use the Battering Ram
Transport and Assembly
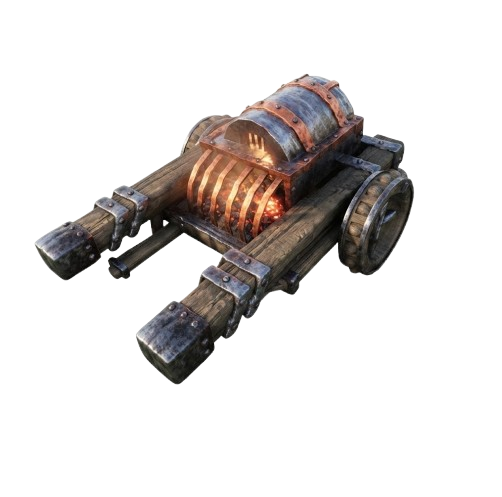
- On-Site Construction: Crafted directly on-site near the target or transported in pieces as raw materials via a portal.
Fueling Requirements
-
Fuel Needed: The Battering Ram requires 25 Wood to fuel.
-
Operation: Requires no additional fuel or wood to operate after fueling, relying entirely on physical player inputs.
Recommended Gear
-
Armor: Equip high-tier armor.
-
Shield: Use a Flammetal Shield to block incoming projectile fire.
Recommended Consumables
- Health Foods: Consume high-health foods like Marrow Mash to endure heavy defensive strikes from fortress walls.
Once you’re prepared with the right gear and resources, you’re ready to position and operate the battering ram.
Positioning and Operating the Battering Ram
Step-by-Step: How to Operate the Battering Ram
-
Place the Ram: Place the ram on relatively flat terrain directly facing the target structure. The Battering Ram can attack walls in any direction, so align it as needed.
-
Fuel the Ram: Add 25 Wood to fuel the battering ram.
-
Attach to the Handles: Approach the rear handles and press E to grip the steering harness.
-
Move the Ram: Walk forward or backward to physically push or pull the heavy framework into position. You can move the Battering Ram like a Cart.
-
Activate Ram Attacks: Press the Left Mouse Button (LMB) while attached to swing the heavy logs forward. The battering ram automatically attacks once positioned correctly and fueled.
-
Position for Cover: Align the protective overhead canopy of the ram with incoming enemy archer fire.
-
Player Safety: Step away from the handles immediately if enemies flank the machine, as you are vulnerable while steering.
Strategic Placement and Fuel Management
-
The battering ram requires strategic placement and fuel management for maximum effectiveness.
-
Ensure the ram is positioned to avoid getting wedged in tight valleys or trenches.
Once you’ve positioned and fueled the ram, you’re ready to coordinate with your team for maximum damage.
Battering Ram Team Use and Damage Mechanics
Damage Formula and Teamwork
-
Damage Calculation: Multiplies structural blunt damage based on the total number of players pushing simultaneously.
-
Strength Requirement: You need 100 strengths to overcome a palisade's soak.
-
Base Damage: One player delivers base damage, while additional players scale the force exponentially per strike.
-
Extra Damage: The Battering Ram deals 20 extra damage when used.
-
Optimal Team Size: Utilize a team of two to three players for maximum operational speed and defense.
-
Equipment Influence: Character skills do not alter ram damage; structural damage is entirely fixed by the machine type.
Vulnerability and Protection
-
The battering ram is vulnerable and requires protection from other players during use.
-
Players should clear enemies before using the battering ram to avoid being overwhelmed.
After understanding team mechanics and vulnerabilities, you can focus on selecting the best targets and siege strategies.
Siege Targets and Best Practices
Ideal Targets
- Use exclusively against Charred Fortress Gates and reinforced stone walls.
Fortress Breach Approach
-
Preparation: Clear the immediate perimeter of enemies.
-
Deploy: Drop a protective shield bubble, deploy the ram, and focus strikes on the main gate.
-
Timing: Swing the ram immediately after the recoil animation finishes to maintain a steady, high-damage rhythm.
-
Stamina Management: Pushing and swinging the ram drains stamina; pause between swings or use stamina meads to stay active.
Additional Uses
- The battering ram can also be used for resource gathering and demolishing structures.
Breach Consequences
-
Enemies can rush out immediately after breaching the gate with the battering ram.
-
Once the ram is breached, quick exits are advised to avoid crowding from enemies.
With these best practices, you’ll be ready to troubleshoot any issues that arise during your siege.
Troubleshooting and Common Issues
Placement Issues
-
'No Use' Option Cause: Triggers if the ram is placed outside a Black Forge zone or on excessively steep slopes.
-
'No Use' Option Fix: Flatten the ground with a hoe and ensure a functional Black Forge is nearby.
-
Placement Conflicts: Clear surrounding rocks, debris, and ancient structures that overlap with the ram's large blueprint boundary.
-
Fitting Conflicts: Avoid tight valleys or narrow trenches where the wide frame of the siege engine can get wedged.
Movement Problems
- Path Smoothing: Break underlying rocks or build flat wooden iron floors over jagged terrain to smooth out the path.
Harness Problems
- Interaction: Ensure your character is standing completely still on even ground before attempting to press the interact key.
Once you’ve resolved any issues, you may encounter security verification steps when accessing online resources.
Performing Security Verification
Why Verification Appears
- Online wikis and community databases often deploy automated security checks to prevent bot scraping and DDoS attacks.
How to Complete Verification
-
Wait for Completion: Allow the background script to run for 5 to 10 seconds without refreshing the webpage.
-
Complete Page Steps: Click the checkboxes or solve the image puzzles manually if the automated verification pauses.
Security Verification Details
-
Common Captcha Indicators: Look for interactive puzzles requiring you to identify specific objects or slide puzzle pieces into place.
-
Clear Browser Cache: Wipe your browser's temporary files if the verification loop keeps resetting or freezing.
-
Disable Active VPNs: Turn off proxy networks temporarily, as security systems frequently flag shared VPN IP addresses.
Verification Successful
-
Confirm Site Access: Verify that the webpage reloads completely and displays the full text database.
-
Resume the Guide: Continue reading the advanced Ashlands strategies once the site grants full clearance.