How to Upgrade Workbench in Valheim
Learn how to upgrade your workbench in Valheim with this step-by-step guide. Enhance your crafting experience and improve your gameplay today!

Shahrukh Sial is a Gaming Content Strategist at Sparked Host. He identifies his own strategic outlines through deep research to cover game guides, tips, and updates that help players improve their skills and enjoy a better gaming experience.
Workbench in Valheim: Quick Overview
-
One of the first structures you will need: The Workbench is a primary crafting station where you can not only repair your items but also produce basic weapons and set a building boundary (by means of a workbench) for a small base.
-
How workbench levels affect players: As each item requires a certain level of craftsmanship, a more powerful Workbench enables players to learn new types of recipes and also enhance their existing gear.
-
Requirement of shelter: You need to make sure that your Workbench is entirely sheltered inside a house or covered building otherwise you might run into all types of disasters due to the unpredictable weather and elements of Valheim. Therefore, if your Workbench is outside, it is better you don't even attempt to work your magic with it, otherwise you might just waste a lot of resources for nothing.
This guide aims to be a full-fledge tutorial on how to upgrade workbench in Valheim. Upgrading your workbench is essential for unlocking advanced crafting recipes and improving your survival chances in Valheim. It is particularly suitable for the players who are at the early-to-mid game phase and want to get themselves some high-tier gear and base-building structures.
By building around the Workbench and placing it with another 3 types of upgrades, you can upgrade your Workbench to Level 2 from Level 1. These upgrades are improvement structures that must be built within close proximity to the workbench. Eventually, by doing this step multiple times, your Workbench's level will go up all the way to the limit of Level 5 which is the max vanilla cap.
This level of progression is a prerequisite to make advanced tools by yourself, extract metals and ore from raw form, and take care of the maintenance of special weapons that have been taken damage.
(Improvement structures are special buildable items that, when placed near your workbench, increase its level.)
Workbench Upgrade Summary Table
Below is a concise summary of each workbench level, the required improvement structure, and the exact materials needed for each upgrade:
| Workbench Level | Improvement Structure | Materials Needed |
|---|---|---|
| 1 | None | None |
| 2 | Chopping Block | - 10 Wood - 10 Flint |
| 3 | Tanning Rack | - 10 Wood - 15 Flint - 20 Leather Scraps - 5 Deer Hide |
| 4 | Adze | - 10 Fine Wood - 3 Bronze |
| 5 | Tool Shelf | - 10 Fine Wood - 4 Iron - 4 Obsidian |
Step-by-Step Guide to Leveling Up Your Workbench
Upgrading a workbench in Valheim requires building specific improvement structures. These improvement structures must be built within close proximity (approximately 2-5 meters) to the workbench to upgrade it.
-
The correct upgrade order: You must first make the Chopping Block (Level 2), then the Tanning Rack (Level 3), followed by the Adze (Level 4), and lastly the Tool Shelf (Level 5).
-
Rule of physical nearness of new structures to old ones: Manufacture and place new items right beside your workbench with a Hammer.
-
Level-up through placement: A golden glow line will appear and merge the new build with your workbench when you position it, raising its level by one instantly.
-
New recipe access: If you take a peek at your Workbench interface after the upgrade, you'll start seeing new crafting recipes and also higher level gear types.
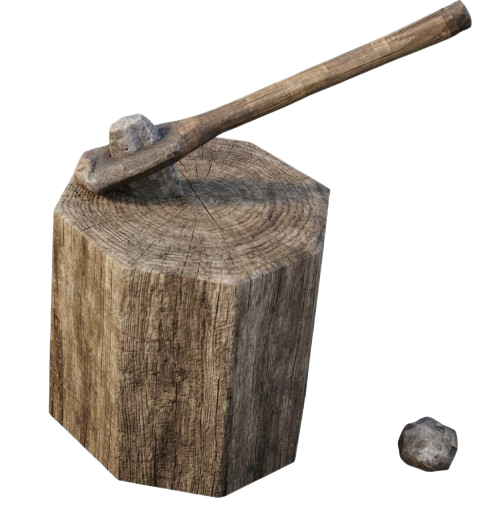
Chopping Block (Level 2)
-
How to create the Chopping Block:
-
10 Wood
-
10 Flint
-
-
Close placement of the log: Deposit the log-type building within 2 to 3 meters from your workbench.
-
Flint collection: Look out for pale smooth grey flint stones in shoreline and beach areas of Meadows biome.
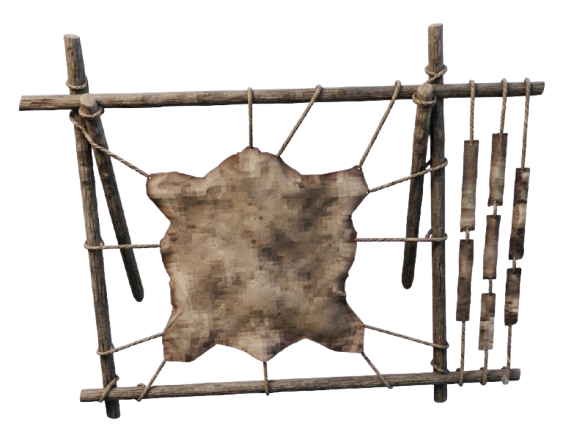
Tanning Rack (Level 3)
-
Materials needed:
-
10 Wood
-
15 Flint
-
20 Leather Scraps
-
5 Deer Hide
-
-
Source animal skins: Use bows for Deer hunting to collect hides. For Leather scraps, hunt wild Boars in the Meadows.
-
Metal detector: Make sure the tanning rack is set up on a flat surface, and the line of sight from it to the Workbench cannot be blocked.
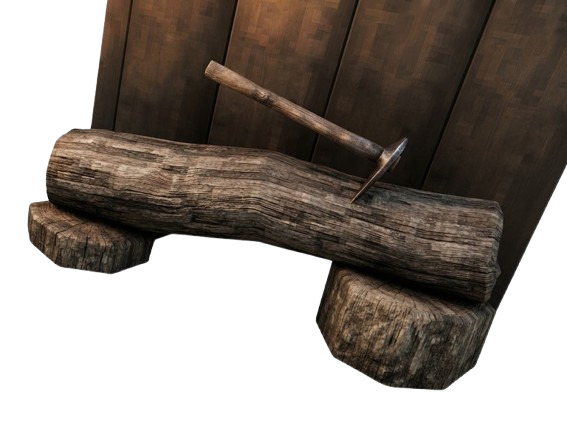
Adze (Level 4)
-
Main materials cost:
-
10 Fine Wood
-
3 Bronze
-
-
Way to level four: Locate copper and tin in the Black Forest. These two metals will be smelted together to make bronze and then the metal will be used for making an Adze and finally you will be able to move to Level 4.
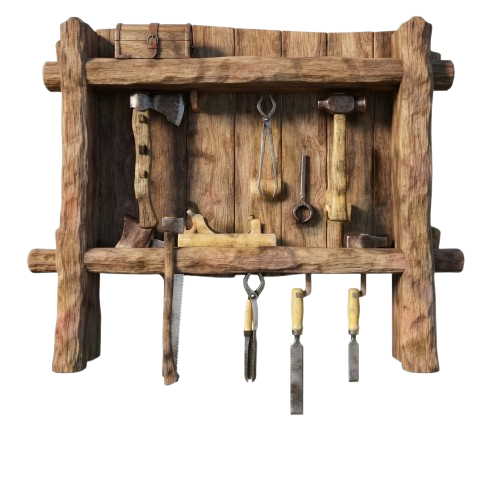
Tool Shelf (Level 5)
-
Maximum Workbench: The ultimate upgrade structure you need to max out your Workbench capabilities.
-
Late game materials needed:
-
10 Fine Wood
-
4 Iron
-
4 Obsidian
-
-
Wall placement rule: The Tool Shelf should be aligned against a wall behind the Workbench or adjacent to its which is different from how other upgrades placed themselves.
-
Level 5 result: When you place this properly the top gear and latest tools upgrade options are opened together with a tool maintenance cycle for later game.
Workbench Level Requirements
Below is a table summarizing what each workbench level unlocks and any special notes:
| Level | Unlocks | Notes |
|---|---|---|
| 1 | Standard Rag Armor, Leather Armor, Stone Axes, Club, Crude Bow | Basic crafting recipes |
| 2 | Flint Spear, Flint Axe, Stagbreaker warhammer, Level 2 equipment upgrades | Durability upgrades for gear |
| 3 | Troll Leather Armor, Finewood Bow, Abomination-tier gear, Level 3 weapon sharpening | Access to higher-tier armor and weapons |
| 4 | Advanced Huntsman Bow, high-tier capes, Root Armor arrays, max-tier tool efficiency | Unlocks advanced gear and tool efficiency |
| 5 | Top gear and latest tools, tool maintenance cycle | Maximum workbench level, unlocks all recipes and upgrades |
| Now that you know what each level unlocks, let's look at where to find the materials needed for upgrades. |
Workbench Upgrades: Materials and Where to Find
-
Meadows items: Gather basic Wood, Flint, Leather Scraps, and Deer Hides entirely within the starter biome.
-
Black Forest items: Chop tall Pine trees for Core Wood, and raid Burial Chambers for Surtling Cores to power your Smelter.
-
Swamp and Mountain metals: Travel to the Swamps to mine iron ore from Sunken Crypts, and scale Mountain peaks to harvest raw Obsidian blocks.
With your materials gathered, it's time to ensure your workbench and upgrades are placed and activated correctly.
Upgrade The Workbench: Placement, Shelter, Activation
-
Build the roof first: Erect at least two wooden walls and a standard 26-degree thatch roof tile over your Workbench to clear the "station too exposed" error.
-
Stay within the radius: All four upgrade structures must sit completely inside the glowing white dashed circle that indicates your Workbench's build zone.
-
Test your activation: Look at the front face of your physical Workbench structure; the displayed level number will instantly tick upward if placed correctly.
Once your workbench is upgraded and properly sheltered, maintaining and organizing your crafting area becomes crucial.
Workbench Level Maintenance and Practical Tips
Maintenance Tips
-
Centralize your workshop: Build your Forge, Smelter, Charcoal Kiln, and Workbench in a tight layout to share structural roofs and chests.
-
Bury excess stations: If your upgrades are cluttering your floor space, dig a shallow trench beneath your floorboards, place the upgrades inside, and cover them back up with wooden floors.
Practical Organization Tips
-
Organize nearby storage: Label wooden chests specifically for raw ores, hides, and fine woods directly underneath your crafting tables.
-
Keep backup tools: Maintain a secondary stone axe inside a chest so you can always repair your primary base if a raid destroys your main station.
If you encounter issues during upgrades, use the troubleshooting tips below.
Workbench Upgrades Troubleshooting
-
Fixing red recipe text: If a gear upgrade is highlighted in red, you have the materials but your current Workbench level is too low.
-
Upgrade failure fix: If an item is placed but the level doesn't rise, it is too far away; use your middle-mouse button to deconstruct it and place it closer.
-
Weather interruptions: If storm winds blow rain sideways into an open window, it can temporarily invalidate your shelter status; seal the gaps with wooden walls.
Workbench Tips from Valheim Guides
-
Prioritize flint early: Dedicate your first 30 real-world minutes to clearing shorelines of flint to secure an immediate Level 2 upgrade.
-
Track with a checklist: Before venturing out on a boat, write down the exact metal and wood counts needed for your next structural milestone.
-
Keep backup tools: Maintain a secondary stone axe inside a chest so you can always repair your primary base if a raid destroys your main station.
FAQs For Upgrading Your Workbench
Do multiple workbenches upgrade independently?
Yes. Upgrades only apply to the single, specific Workbench they are placed next to. Building a second Workbench at an outpost will start that station at Level 1.
Can the Tool Shelf hang anywhere?
No. The Tool Shelf features strict anchor mechanics; it must hang on a structural wall segment that resides within a 5-meter radius of the targeting Workbench.
Does weather damage placed upgrades?
No. While your main Workbench requires a roof to be interacted with, the physical upgrade structures (like the Chopping Block) will not rot or lose health when exposed to rain.
Conclusion
Systematically upgrading your Workbench from Level 1 to Level 5 is the primary loop that dictates your survival speed in Valheim. By matching your biomes to the required crafting materials, progressing from Meadow's flint up to Mountain obsidian, you ensure your weapons remain sharp enough to take on the game's formidable bosses.