Facts About the Minecraft Villager
Discover essential facts about Minecraft villagers, including their jobs, trading mechanics, and more. Read the article to enhance your gameplay experience!

Villagers are passive mobs that live in villages and form the backbone of Minecraft’s in-game economy. You’ll spot adult villagers wandering around small clusters of houses, working at job site blocks, and sleeping in beds at night, while baby villagers running around to play tag add life to the community.
While they don’t attack players, they’re far from useless NPCs; once you learn how to use them, they can become your main source of enchanted gear, ender pearls, and renewable emeralds.
There is an interesting characteristic about the regular villagers' appearance. They spawn naturally in various biomes, and their outfits change according to their habitat. For example, desert villagers wear light robes, snowy villagers bundle up in thick coats, and savanna villagers have bright, patterned clothing.
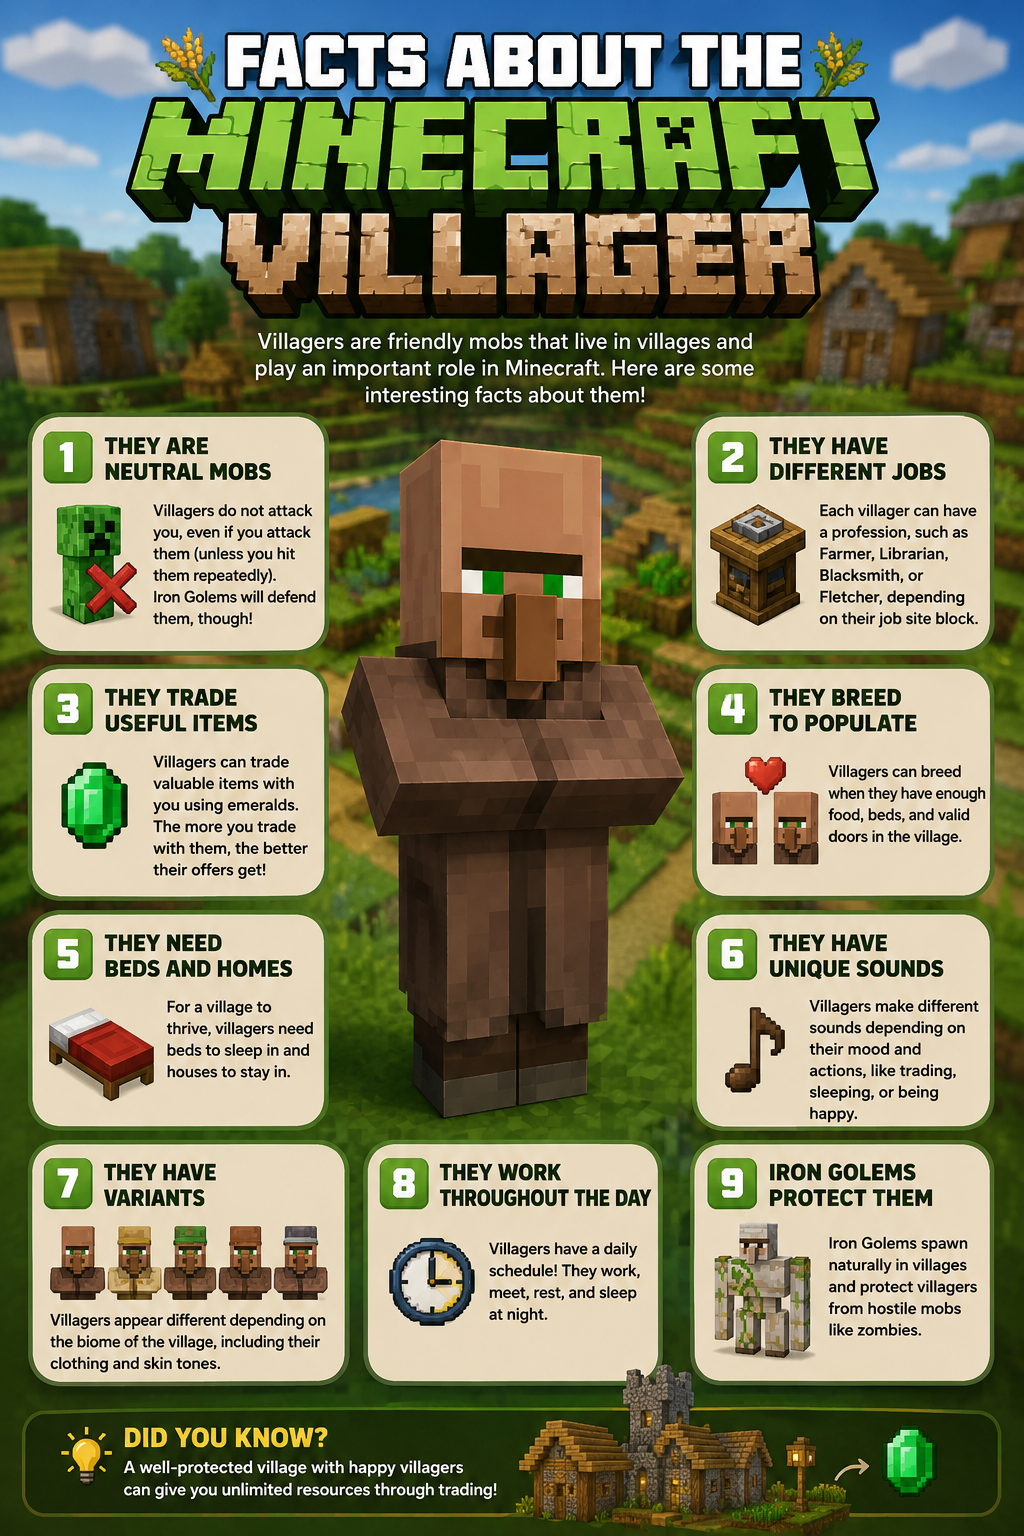
Despite their peaceful nature, their daily lives are full of activity. When a village population is safe and has enough food, you can watch as villagers breed to expand their community. To protect themselves from hostile mobs like zombies and pillagers, they rely on a built-in defense system: if enough other villagers gather and gossip about danger, a massive iron golem will spawn to patrol the area and fight off threats.
Next, the question is what these mobs actually do, and why are they the best in the game? To answer this, let’s move on and discuss the various professions of these Villagers and how their trading system works.
When you approach a villager, your first trade locks in their career path, preventing that same villager from changing jobs later. As you level them up, they offer increasingly rare items—ranging from diamond armor to unique aesthetic items like mob heads, depending on your game version. Unlike other mobs that simply wander or attack on sight, villagers offer a deep, interactive progression system that completely changes how you survive in the world.
Villager Professions
Villagers aren’t just aimlessly wandering around; most villagers have jobs, and those jobs decide what they trade. Professions are tied to job site blocks, so if you want a specific type of villager (say, a Librarian for Mending books), you’ll need to give an unemployed villager the correct workstation. If you want to automate your food supply, for example, placing a Composter will turn an unemployed mob into a farmer villager.
This might sound all confusing and overwhelming at first, but it's super useful and easy to crack once you understand how the Village mechanics work. To make managing them easier, players often use iron doors and fence gates to safely secure and organize them so they don't wander away from their designated workstations.
How Professions Are Assigned
When you explore the world to find villagers, managing their career paths comes down to a few basic rules:
-
A villager without a job (unemployed) will look for the nearest unclaimed job site block during work hours.
-
Once they claim a workstation, they assume the profession associated with that block.
-
They can change professions if their workstation is broken and they haven’t been traded yet. The moment you make a trade, their profession is locked for good.
Let’s see some examples: place a Lectern near an unemployed villager → they become a Librarian. Break the Lectern before trading, and they’ll lose the job and look for a new one.
While managing their jobs is crucial for trading, growing your workforce is just as important. Much like breeding animals in your pens, getting two villagers together with enough food and available beds will allow them to produce offspring, ensuring your trading hall never runs out of potential workers.
The Village Trading System
This is what you are here for! Villager trading is Minecraft’s built-in economy; a renewable way to get rare items, enchantments, and resources that you’d otherwise have to grind for manually. Once you understand the rules, you can bend this system to supply yourself with infinite emeralds, perfect gear, and entire chests of resources with minimal effort.
Let’s first understand how trading works.
Professions and Job Sites
As we have already discussed above, there are multiple professions that Villagers are assigned to or that they take on themselves. It is the single biggest factor in determining their trade offers, and that profession is tied directly to the claimed job site block they’ve interacted with. Without a job site block, a villager can’t have a profession, and without a profession, they can’t trade at all.
Each workstation corresponds to a specific profession, and each profession has its unique trade pool. For example:
-
A brewing stand turns a villager into a Cleric.
-
A fletching table creates a Fletcher.
-
A smithing table assigns the Toolsmith profession.
This means that changing the villager’s workstation (before they’ve been locked in through trading) can be a powerful way to reroll their trades until you get something you like; for instance, breaking and replacing a lectern repeatedly until a Librarian offers the exact enchanted book you’re hunting for. To control their movement while rerolling, players often use trap doors to keep them contained.
The type of workstation determines the profession, but the specific trade options are randomized within that profession’s trade pool. Professions with high-value trades (like Librarians, Toolsmiths, and Farmers who famously wear a straw hat) are something you must target for high-value items.
Even within one profession, trades can offer varying services; for example, Librarians can sell different enchanted books, Cartographers can trade unique banner patterns, and Weapon Smiths can offer varying enchantments on swords and axes.
Interacting with a Villager
Next, we'll explore how you can interact with these villagers.
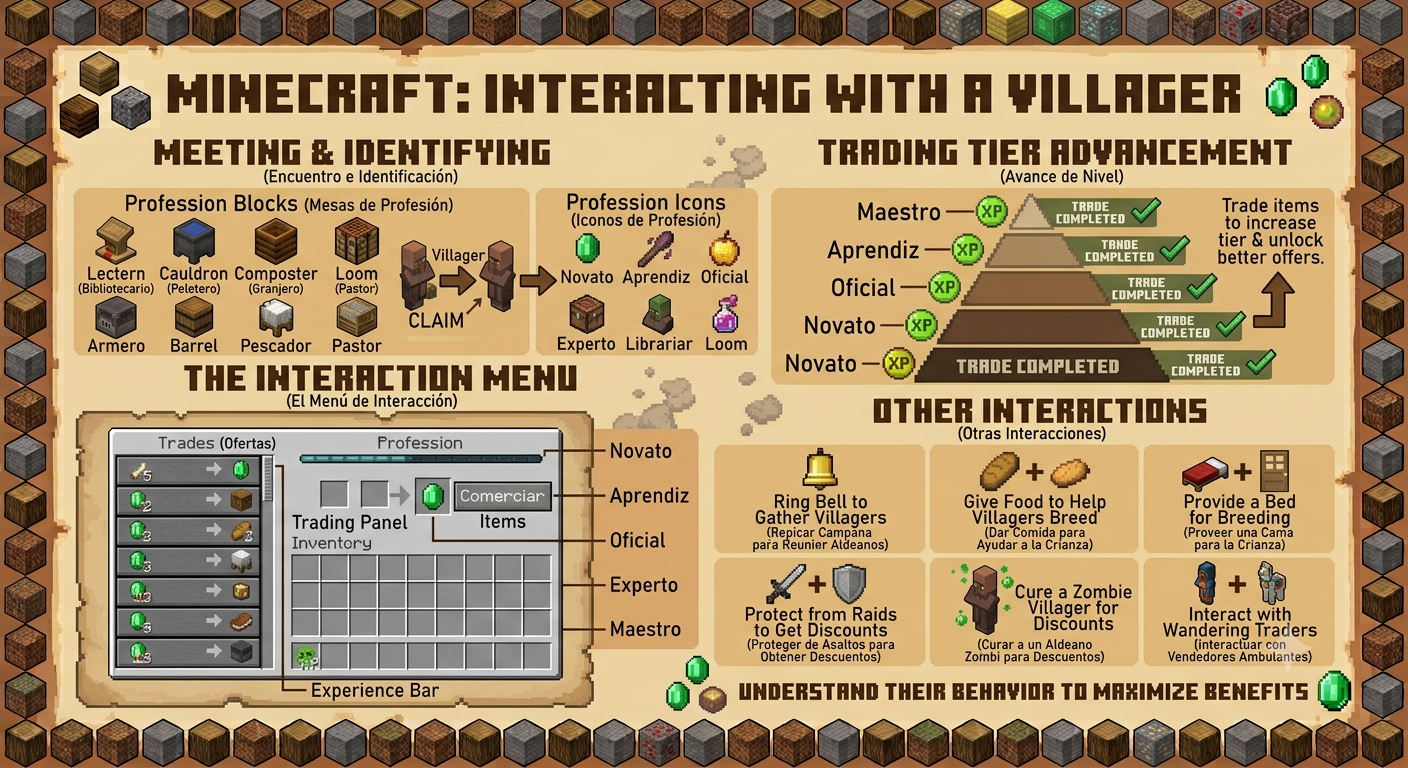
If you are using the Java version, a simple right-click would work, while on the Bedrock version, you need to press the interact button. This will open up the trading menu.
When the interface opens, you’ll see:
-
The villager’s profession icon is in the top left, along with their name if they’ve been named with a name tag.
-
A career-level badge (Novice, Apprentice, Journeyman, Expert, or Master) indicating their progression.
-
A list of available trades, each with an input (what you give) and an output (what they give you).
Also, you will see two types of trade options offered to you:
-
Selling Trade: You give Emeralds to the villager as currency, and they give you the item corresponding to it.
-
Buying Trade: You provide a certain item, and they pay you in emeralds.
Some villagers mix the two, and the exact combination depends on their profession and level. A Farmer might buy wheat, wheat seeds, potatoes, beetroot seeds, or carrots from you (earning you emeralds) while also selling bread, cookies, or suspicious stew. Other professions might request items like sweet berries, carved pumpkins, or rabbit hide to reward you with currency.
Village Infrastructure and Trading Availability
To keep your marketplace functioning, you must understand how certain blocks influence their daily routines. At night, villagers will actively seek out an unclaimed bed to rest and reset their trades for the next day. If you want your community to expand or remain stable, ensuring you have enough beds for more than just one villager is a crucial step in maintaining a thriving trading hub.
The Best Trades for Each Profession
Now that we know the basics of how trading works between you and the villagers through the trading interface, let’s check the most important thing: the best trades offered by each of the different professions.
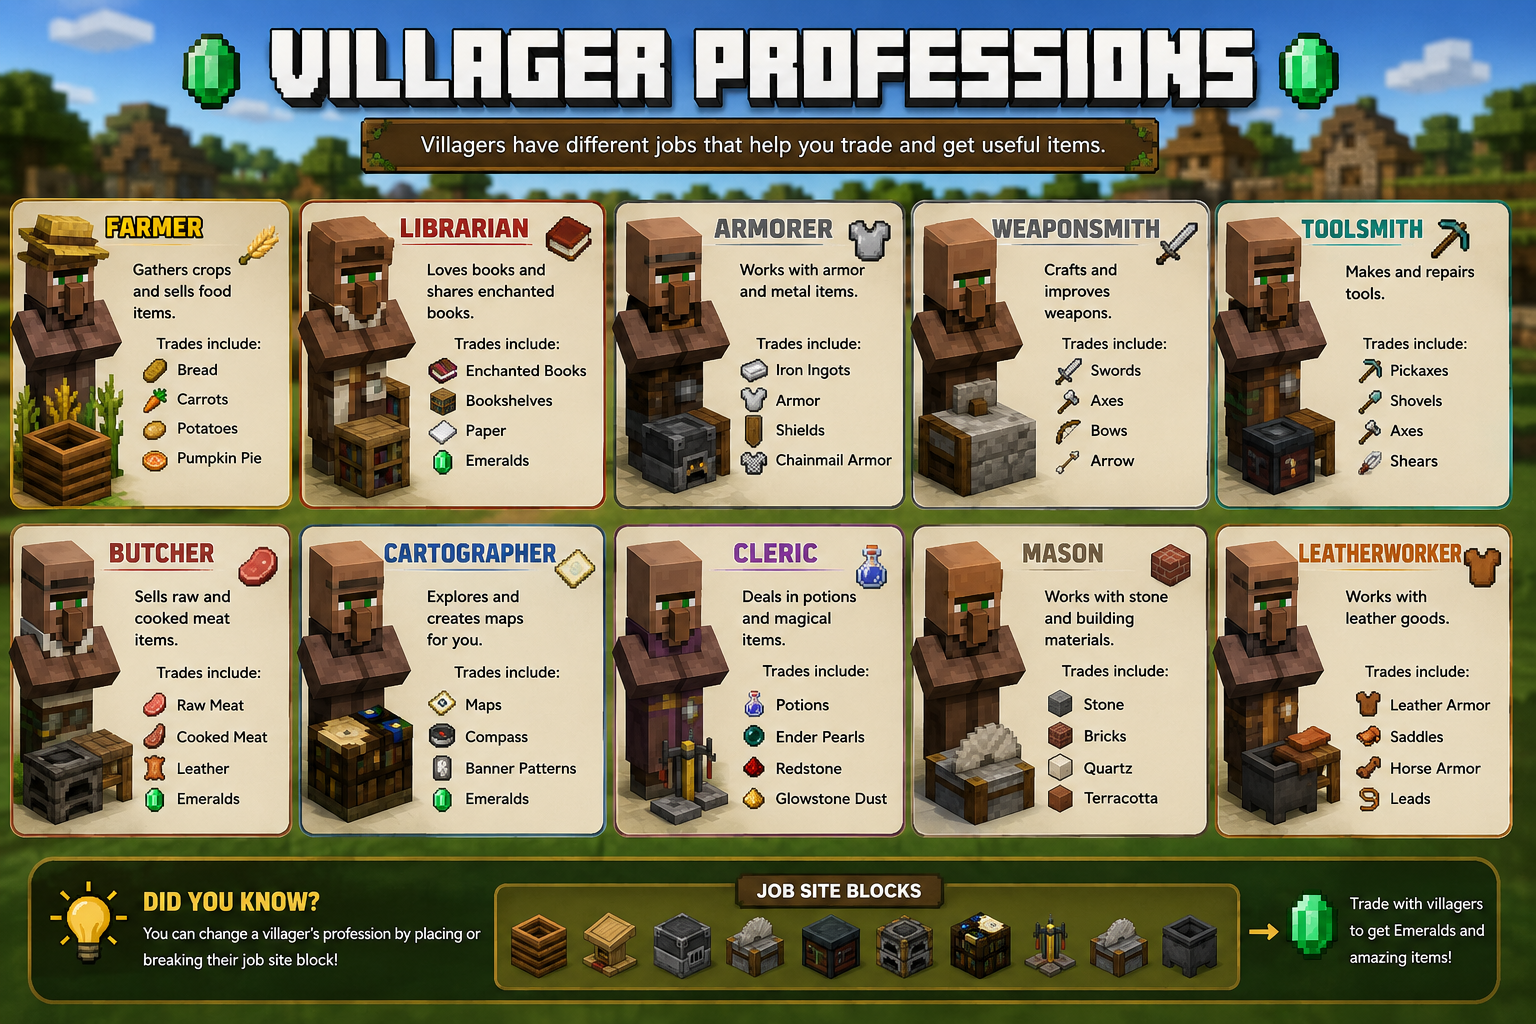
Knowing which villager jobs to set up will completely change your survival experience.
Armorer
Armorer villagers are a survival player’s best friend when it comes to gearing up fast. At Expert and Master levels, they’ll sell fully enchanted diamond armor—chestplates, leggings, helmets, and boots—for just a few emeralds if you’ve stacked up discounts. They also offer shields early on and will happily buy your excess iron for emeralds, which makes them a great partner if you’ve got an iron farm running.
Butcher
Next, we have the Butchers. These villagers are perfect when you are looking for cooked food items instantly. At higher levels, they’ll sell cooked porkchops and steak, both top-tier foods for saturation. Early on, you can also trade raw chicken for emeralds, which is again perfect if you have a small chicken farm ticking away in the background.
Cartographers
These have some of the best loot in the game, although some players might disagree. They offer items, such as Woodland Explorer Maps and Ocean Explorer Maps, which can lead you straight to mansions and monuments for totems, sponges, and rare blocks. If you’re into trade loops, they’ll also buy glass panes for emeralds, and you can get the glass from a Librarian for cheap.
Farmers
Similar to the Butcher, you can get food from the Farmers. They are considered to be the backbone of the entire trading system. You can give them crops like wheat, carrots, potatoes, and beetroots in exchange for emeralds, which are easy to grow. At an Expert level, they sell golden carrots, one of the best foods in the game. They can also trade suspicious stews with effects like Night Vision. Additionally, because Farmers naturally share food with their neighbors, they are key to keeping the colony growing.
Fletcher
This is the one you need to pay more attention to. Fletchers can give you an enormous amount of emeralds. The Novice-level stick trade is so good it’s borderline broken; you can turn renewable wood into emeralds almost instantly, even from your very first trade with them. Higher-level Fletchers also offer tipped arrows for rare effects and even get enchanted bows and arrows.
Fishermen
Fishermen are highly underrated. You can offer them raw fish in exchange for emeralds. And if you have an automated farm set up, you can trade a great number of emeralds from it. When it comes to buying from them, it may not be that good. At a higher level, you can get enchanted fishing rods, boats, and other average items.
Librarians
One of the most important villagers that is essential for your survival in the long term is the Librarian. From Novice to Master, they offer enchanted books, with top targets being Mending, Unbreaking III, Efficiency V, and Fortune III. They also sell name tags and bookshelves, plus glass, which pairs perfectly with Cartographer trades.
Masons
Then we have the Masons. It is yet another one of the best traders in Minecraft. With just 10 clay balls, you can get an emerald from them. And at Expert level, you can sell quartz blocks to skip tedious Nether mining. At higher levels, you can buy terracotta and glazed terracotta in multiple colors, letting you stock up for big builds.
Shepherds
If you have a sheep farm set up at your base, Shepherds can be of great help to get as many emeralds as you want. They’ll buy wool in any color for emeralds and, as they level up, sell dyed wool and carpets for decoration projects.
Toolsmiths
This villager is primarily suited for high-level trades. You can get emeralds from them by selling them coal, iron ingots, and other items. However, what you really need them for is to trade emeralds for some overpowered tools such as enchanted Diamond pickaxes, axes, shovels, hoes, etc.
Weaponsmiths
Lastly, we have the Weaponsmiths. Similar to Toolsmiths, these also can offer you enchanted diamond weapons in exchange for an emerald, which you may not get anywhere else. You can save a ton of diamonds through this process and use them for other purposes.
Zombie Villagers and the Curing Process
You might sometimes come across Zombie Villagers. The most common way is through natural spawning at night, where about 5% of zombies in Java Edition and up to 10% in Bedrock Edition will generate as Zombie Villagers.
But there are other chances too when these show up. For example, during a raid, Illager waves can include zombie villagers, or sometimes, when a zombie attacks, instead of dying, the villager has a chance to be converted: 0% on Easy, 50% on Normal, and 100% on Hard difficulty. Similar to other Zombies, Zombie Villagers can spawn with armor or weapons, making them more dangerous than you might expect.
Curing Process
You can cure the Zombie villagers back to normal villagers with a simple method. First, you’ll need a Splash Potion of Weakness and a Golden Apple.
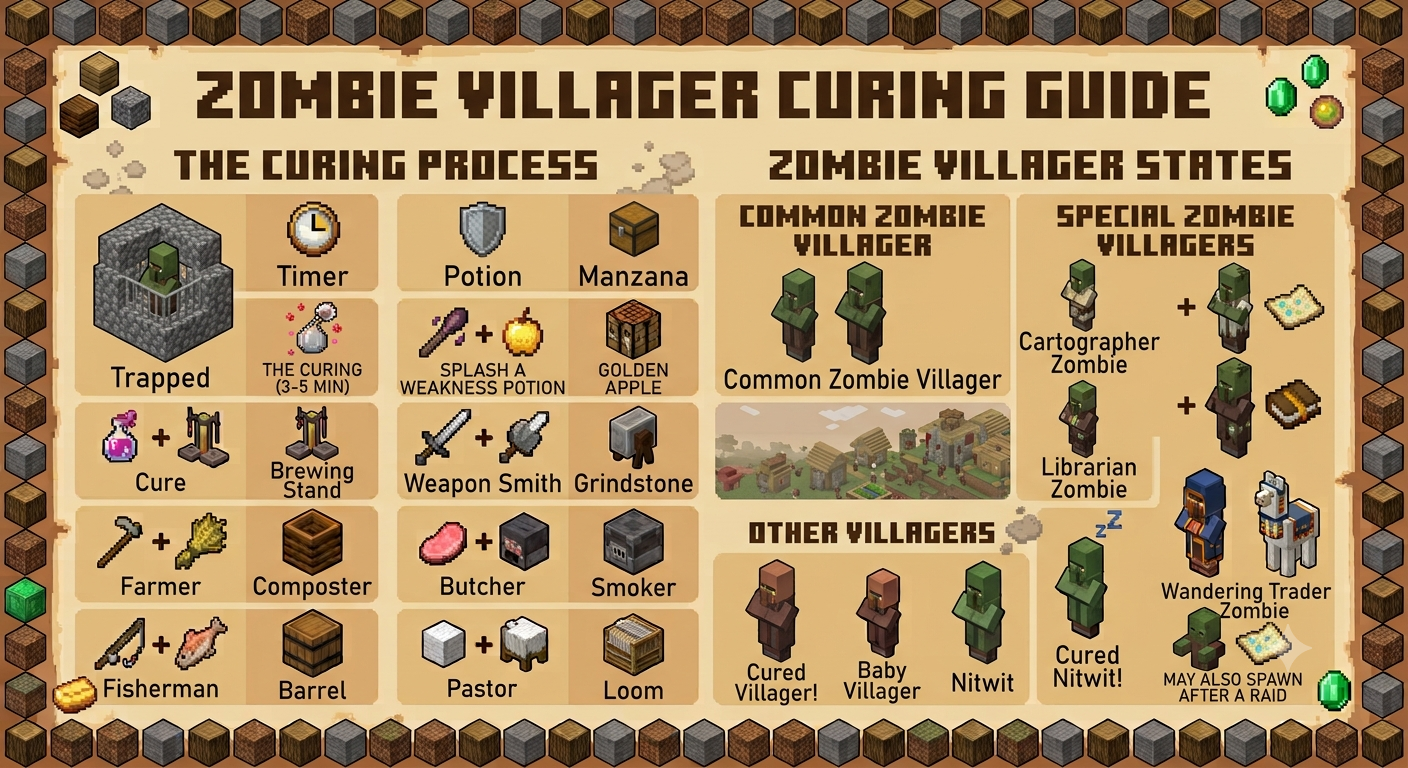
The potion weakens the zombie villager, making it vulnerable to the cure, while the golden apple actually triggers the transformation.
There are a few points that you need to take care of while curing the villagers:
-
Isolate and Protect: Start by trapping the zombies individually away from each other. Also, make sure to cover them up during the day, or they will be burned due to sunlight.
-
Prepare the Potion: Brew or get a Splash Potion of Weakness. This is crafted by brewing a fermented spider eye into a potion, then turning it into a splash potion with gunpowder. You can also get one from wandering traders in Bedrock.
-
Apply the Weakness Effect: Throw the potion on the villager, and you will see gray swirl particles when it’s successfully applied.
-
Administer the Cure: Next, feed them Golden Apples right after using the potion. You will hear a hissing sound, and red particles will appear.
-
Wait for the Transformation: The curing does not happen instantly; it can take 2-5 minutes for each villager. However, to speed up the process, you can place an iron bar or bed nearby.
-
The Return: The Zombie Villager returns to its normal villager form, keeping its profession and job site block if it had one before infection.
Why Cure Villagers?
You might be wondering why we are even curing the villagers? Well, this is one of the best strategies in the game to get items at a discounted price. The biggest reason players go through the trouble of curing is the trading discounts.
When you cure a villager, it remembers that you were the one who saved it. Out of gratitude, that villager permanently lowers the prices of its trades for you. For example, a librarian who normally sells an enchanted book for 30 emeralds might drop the cost to just a few emeralds after curing. The number is generally a 5% discount for regular items and even more for special items.
Many players deliberately set up auto-zombification and curing stations to get massive discounts every time.