How To Farm In 7 Days To Die
Learn how to farm in 7 Days to Die. Discover how to plant crops, gather seeds, and grow food to survive longer in the apocalypse.

In 7 Days To Die, farming plays a fundamental role in your survival strategy for several reasons. First, it provides a reliable source of food and resources, reducing your dependence on hunting and gathering. Second, agriculture allows you to grow specific crops that can be used to create high-quality food and beverages. In addition, it is essential for maintaining your overall well-being and health.
This guide will show you how to farm in 7 Days To Die in just a few minutes.
Craft Farm Plots
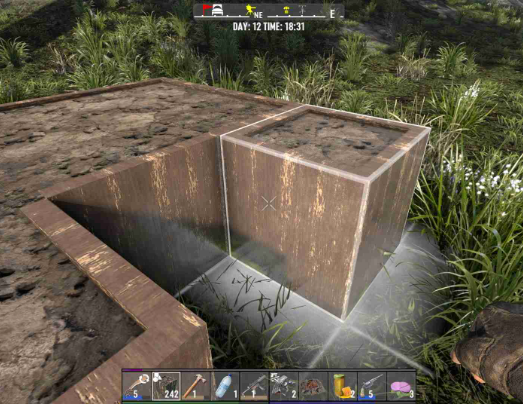
First, you must create an agricultural plot before you can start farming. To begin, take these steps:
-
Access your inventory: To access your inventory, press the corresponding key, which in most cases is “I” by default.
-
Open the crafting menu: Locate the crafting menu in your inventory and then click to open it. In this menu, you can create anything you want to create.
-
Create a farm estimate: Review the crafting menu to find the recipes for farm plots. If you have the supplies, you can build one using a 4x4 farm plot.
-
Plant the farm plot: Next, exit the crafting menu and select “Farm Plot” from your inventory, choose the correct position, and place it. Make sure there is a valid space to grow crops.
How to Use Farm Plots
-
Open your inventory and go to the crafting menu.
-
Search for "Farm Plot" and click on the recipe.
-
Ensure you have all the required materials in your inventory.
-
Click "Craft" to create your Farm Plot.
-
Place the Farm Plot where you want your farm to be. It can be placed indoors as long as there is adequate lighting (sunlight from a window or an artificial light source).
-
Equip your seeds and plant them by right-clicking on the Farm Plot.
Make Seeds
In 7 Days to Die, obtaining seeds is crucial for a sustainable food supply. There are three main ways to get them: looting, trading, and crafting. While looting and trading are good for starting, crafting seeds is key to expanding your farm and achieving true self-sufficiency.
Place Your Farm Plots
Placing your farm plots strategically is a crucial step for setting up a successful and efficient food supply in 7 Days to Die. The wrong placement can lead to your crops being destroyed or a lot of wasted effort.
Here's a breakdown of the best places to put your farm plots, depending on your stage in the game and what you're trying to achieve:
-
Where: Place your farm plots on the floor of a secure, well-defended house or the ground floor of a building you've claimed.
-
Why: This is the safest option in the early game. It protects your fledgling crops from wandering zombies, zombie dogs, and other threats. Since you're not yet equipped to deal with large hordes, a secure interior room prevents your hard work from being destroyed before you can harvest it.
-
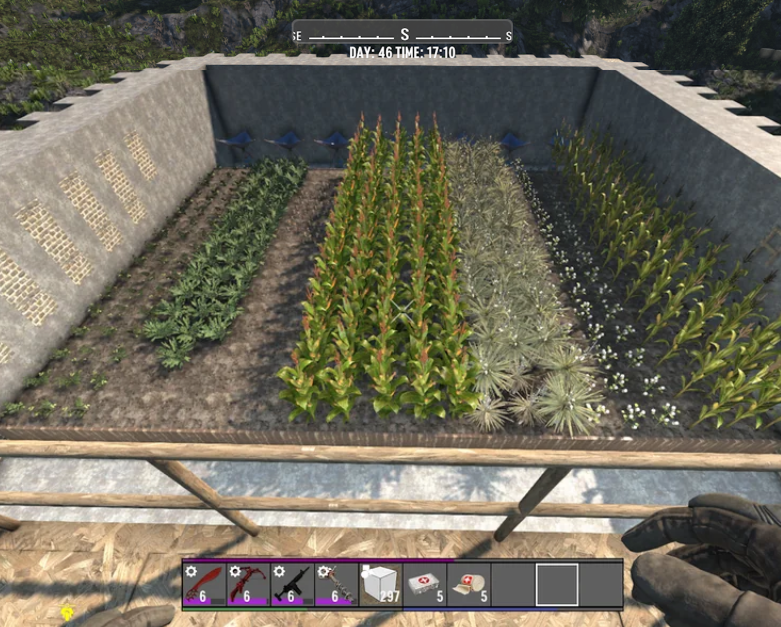
Best Crops: Stick to basic crops like Corn, Potatoes, and Blueberries. Just make sure there is enough light coming in from windows or a few torches.
Key Considerations for All Locations
-
Light: As mentioned, most crops need light. Make sure there is ample sunlight or a reliable source of artificial light (torches, ceiling lights, grow lights).
-
Security: Always consider how zombies might reach your farm. A fence is better than nothing, a wall is better than a fence, and a secure, sealed room is the best of all.
-
Water: You do not need to water your crops in 7 Days to Die. They will grow on their own once planted in a Farm Plot, regardless of the weather.
-
Aesthetics: You can also place farm plots in open fields or on the ground outside your base for a more traditional farm feel, but be aware that they are fully exposed to threats. This is a riskier, but sometimes necessary, approach in the early game.
Can You Place Farm Plots Indoors?
You absolutely can place farm plots indoors in 7 Days to Die. Doing so is often the recommended strategy for a secure and sustainable food source.
However, there's a crucial condition you need to be aware of: light.
For most crops to grow, they need a source of light. This light can come from:
-
Direct Sunlight: This is the most common and effective method. You can place your farm plots indoors, but they need to be under an open hole in the ceiling or near a window to receive sunlight from the sky. The light can "splash" or spread a few blocks, allowing you to create an indoor farm with a controlled opening to the outside.
-
Artificial Light: While not as common or efficient as sunlight, you can also use certain artificial light sources, like Grow Lights, to provide the necessary illumination. This requires power from a generator or solar panels, but it allows you to create a completely sealed-off, secure room for farming.
Why Indoor Farming is a Good Idea
-
Zombie Protection: An indoor farm is safe from wandering zombies, dogs, and other threats that could destroy your crops if they were planted in the open.
-
Horde Protection: During a Blood Moon horde night, zombies will path to and attack anything in their way, including your outdoor crops. An indoor, sealed-off farm is completely safe from this kind of destruction.
-
Security: Farming in a well-defended, enclosed space prevents Screamers from being attracted by your activities and drawing in a horde.
-
Convenience: You can place your farm plots in a basement or on a specific floor of your base, keeping all your food production close to your crafting stations.
Need To Farm Indoors? Use Mushrooms
You’ve stumbled upon one of the best-kept secrets for a truly secure food supply in 7 Days to Die. Most crops need sunlight to grow, which makes indoor or underground farming tricky. You either have to build a skylight, use windows, or place your farm on the roof.
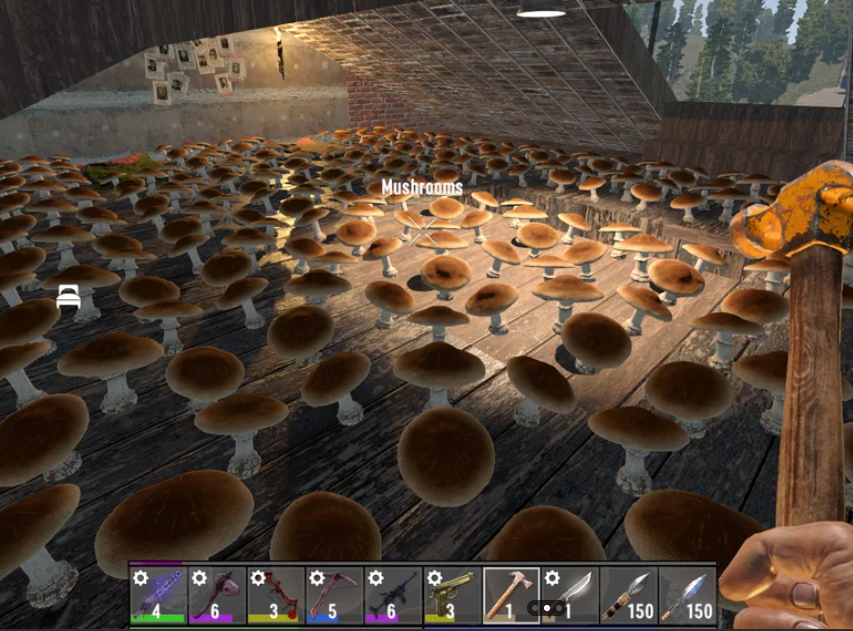
Mushrooms in 7 Days to Die have a unique property: they do not require light to grow.
This simple fact makes them the perfect candidate for a safe, secure, and self-sufficient farm located entirely indoors or even deep underground in your base.
How to Get Started with Your Mushroom Farm
-
Find Your First Mushrooms: Mushrooms are found in the Burnt Forest biome, in caves, or as rare loot in certain locations. Collect as many as you can find.
-
Craft Mushroom Spore Seeds: You can craft Mushroom Spore Seeds from the mushrooms you find. The recipe is simple and available from the start.
-
Place Farm Plots: Craft and place Farm Plots in your chosen indoor location. Since you're not farming in the open, you don't need to worry about sun exposure. You can place the farm plots on any floor.
-
Plant and Wait: Plant your Mushroom Spore Seeds in the Farm Plots. You can come back in a few in-game days to harvest a steady and reliable supply of food.
Plant Your Seeds And Wait
Once you have your seeds and have crafted a Farm Plot, the final step to starting your farm in 7 Days to Die is to plant your seeds and let them grow. This process is straightforward, but there are a few important details to remember.
How to plant your seeds:
-
Select a Location: Place the Farm Plot on the ground where you want your farm to be. This can be on the surface, on a rooftop, or even indoors. Remember that most crops need a light source (sunlight or artificial light) to grow.
-
Equip Your Seed: Open your inventory and drag the seeds you want to plant to your hotbar.
-
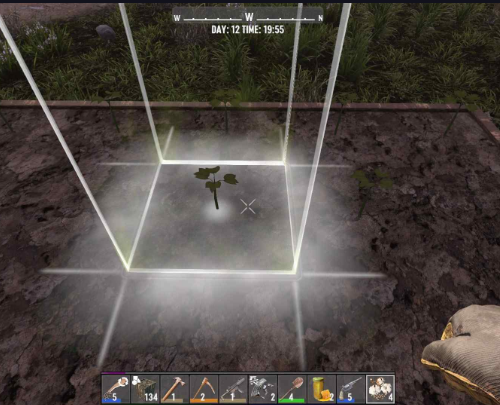
Plant the Seed: With the seed selected on your hotbar, simply right-click on the Farm Plot you just placed. The seed will be consumed, and a small seedling will appear in the plot.
The Waiting Game: How Long Until Harvest?
The time it takes for a plant to grow varies depending on the specific crop. The game's internal clock works in minutes, and most crops take between 30 to 60 minutes of in-game time to mature. This translates to roughly one to two in-game days.
You can tell if a crop is ready to be harvested by its appearance. A fully grown crop will look distinct and complete, such as a large stalk of corn with visible ears or a full bush of blueberries.
Important Things to Remember
-
One Seed Per Plot: Each Farm Plot can only hold one seed at a time.
-
The Plant Is Destroyed: Unlike in older versions of the game, when you harvest a plant, the Farm Plot and the plant are destroyed. This is a key change. To grow another crop, you'll need to place a new Farm Plot and plant another seed.
-
No Watering: You do not need to water your crops or do any other maintenance. They will grow on their own once planted, regardless of the weather.
-
Planting on Raw Soil: You can technically plant seeds directly in the ground without a Farm Plot, but it's not a good idea. Planting in raw soil takes much longer for the crop to grow and offers no seed return upon harvest, making it completely inefficient for a sustainable farm.
Harvest Your Seeds
Once you've planted your seeds in a farm plot, the next step is to harvest them for food and to get more seeds to expand your farm. This process has changed significantly in recent alphas of 7 Days to Die (specifically, Alpha 20 and newer), moving away from an automatic, one-to-one seed return.
Here's how harvesting works in the current game:
-
Wait for the crop to fully grow: You can't harvest a plant until it has reached its full growth stage. You'll know it's ready when the plant looks mature and complete, with visible food items like corn ears or potatoes.
-
Interact with the plant: Simply walk up to the fully grown plant and press your "use" key (the default is 'E'). Your character will automatically harvest the crop.
-
The Plant Disappears: A key change is that the entire plant and farm plot are destroyed when you harvest it. You will need to replace the farm plot and re-plant a new seed to continue farming.
Recommended: Get The "Living Off The Land" Perk
The "Living Off The Land" perk is a fundamental skill in the Fortitude skill tree that is crucial for anyone who wants to rely on farming for their food supply. It's the key that turns you from a basic food collector into a highly efficient farmer.
Here’s a breakdown of what this perk does and why it's a must-have:
-
Increased Yield: The primary benefit is that it significantly boosts the amount of crops and seeds you get from each plant you harvest. At the initial level, you'll get more food per plant than you would without the perk. As you invest more points, this bonus increases, guaranteeing a surplus of food and a self-sustaining farm.
-
Harvesting Efficiency: Each point you invest makes your farming faster and more efficient. This means you can plant and harvest your crops at a quicker pace, saving you valuable time.
-
Unlocks Advanced Recipes: Higher levels of the "Living Off The Land" perk are required to unlock advanced cooking recipes. This is where you turn your basic crops into highly nutritious meals like Vegetable Stew, which provides much better health, stamina, and hydration benefits than raw food.
-
Crafting Seeds: The perk also plays a direct role in your ability to craft seeds from your harvested crops. This is essential for expanding your farm and creating a cycle of self-sufficiency.
In short, "Living Off The Land" is the skill that allows you to move away from the risky and time-consuming process of looting for food. It is a smart, long-term investment that provides a reliable food source and frees you up to focus on other critical survival tasks.
Conclusion
In conclusion, while scavenging for food is a necessary evil in the early days of 7 Days to Die, farming is the ultimate key to survival. It transforms your gameplay from a frantic, day-to-day struggle into a strategic effort toward long-term prosperity.
By investing in the "Living Off The Land" perk, crafting your Farm Plots, and strategically placing them in a secure location (especially indoors or underground), you can establish a reliable, infinite food source. This frees you from the constant, risky search for food, allowing you to focus on what truly matters: building an impenetrable base, crafting powerful gear, and outsmarting the relentless hordes. Happy farming!