Where to Find Bell Fragments in Valheim
This guide shows you how to find Charred Fortresses, get inside and move through them safely, what layout and threats to expect, where to locate and extract Bell Fragments, and which strategies make clearing these fortresses easier.

Shahrukh Sial is a Gaming Content Strategist at Sparked Host. He identifies his own strategic outlines through deep research to cover game guides, tips, and updates that help players improve their skills and enjoy a better gaming experience.
If you are looking to challenge the 7th boss, Fader, you need to craft three Bells, and Bell Fragments in Valheim are found only inside Bell Altars within Charred Fortresses in the Ashlands biome, marked by a green beacon of light. This guide is for Valheim players seeking to progress to the Ashlands and challenge the Fader boss. Bell fragments are a key progression item required to summon the game's seventh boss. For players at this stage of progression, those fragments are essential crafting materials, since the Bells are required to summon Fader. Access to the Ashlands requires defeating the Mistlands boss first.
This guide shows you how to find Charred Fortresses, get inside and move through them safely, what layout and threats to expect, where to locate and extract Bell Fragments, and which strategies make clearing these fortresses easier.
What Are Bell Fragments?
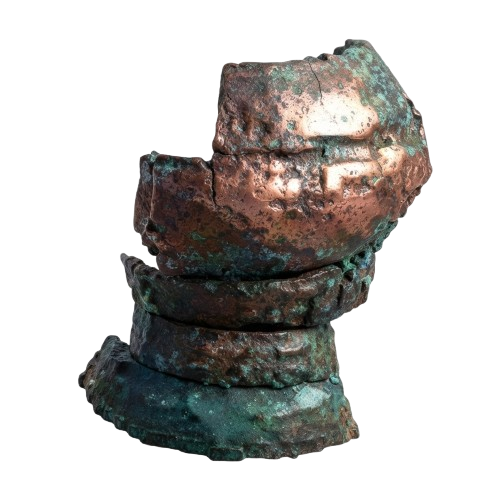
Bell Fragments are crafting materials required to create the Bell at a Black Forge. Bell fragments are found in charred fortresses in the Ashlands. You cannot find a complete Bell in the wild; you must craft it.
-
Usage: Crafting Bells (3 Fragments per Bell).
-
Boss Requirement: Summoning Fader requires 3 Bells, meaning you need a total of 9 Bell Fragments.
-
Source: Bell Altars located inside Charred Fortresses.
-
Drop Count: Destroying a Bell Altar drops 2 to 4 Bell Fragments.
-
Properties: Weight 0.5, Stack limit 9, Teleportable (Yes).
-
Crafting: Bell fragments cannot be crafted and are finite in number.
Since a single fortress only provides a maximum of 4 fragments, you will likely need to visit and clear at least three Charred Fortresses to gather enough materials to summon the boss.
How to Find a Charred Fortress
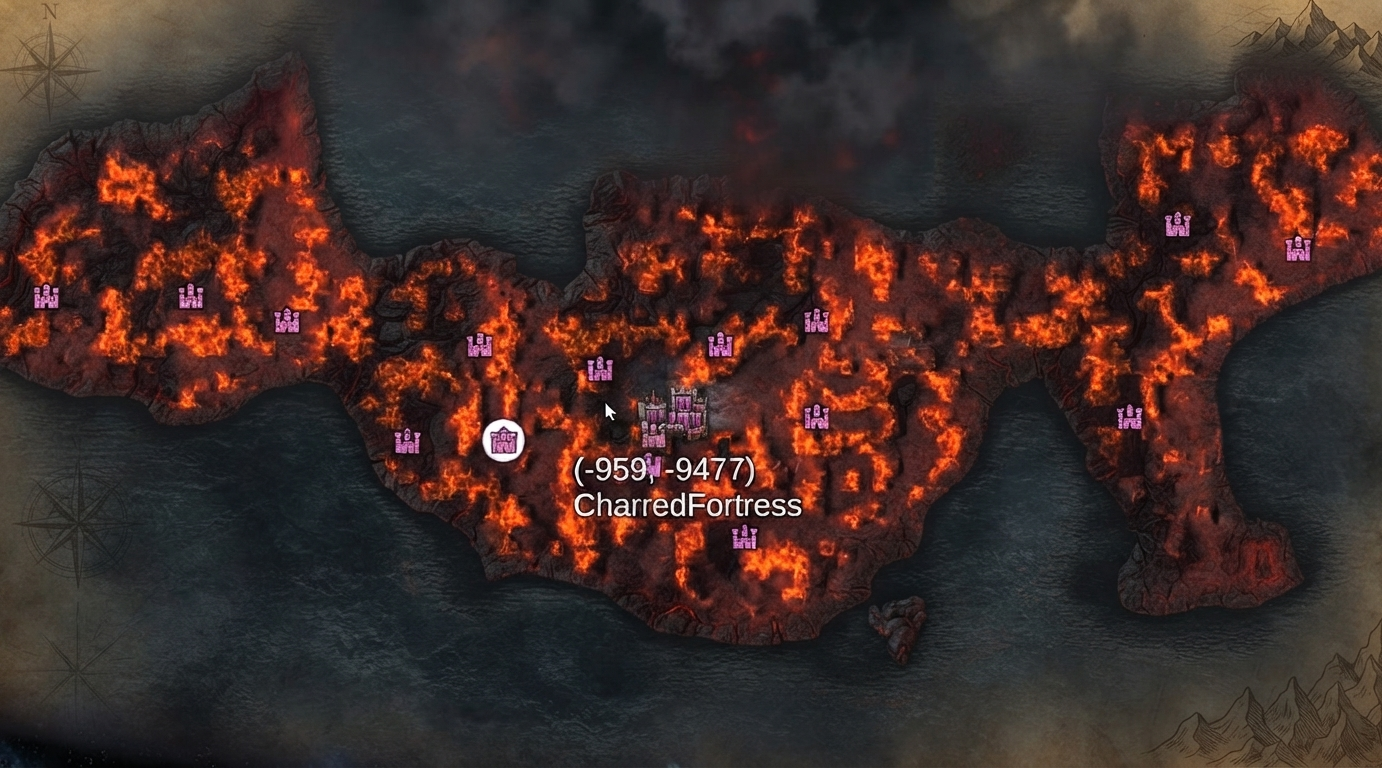
Charred Fortresses are specific Points of Interest located in the Ashlands. You cannot miss them if you are in the right area.
Look for the Green Beacon
The primary way to locate a fortress is by looking for a beam of green light shooting straight up into the sky. This beacon is visible from a great distance.
-
The beacon originates from the Bell Altar inside the central tower of the fortress.
-
If you see this green light, a Charred Fortress is directly underneath it.
Note: Destroying the Bell Altar inside will remove this beacon. If you destroy the altar, the light disappears, and the location will no longer be marked on the map or visible via the beacon.
Location Constraints
-
Biome: Ashlands (Southernmost part of the world). Reaching the Valheim Ashlands Biome is part of the Ashlands update progression and requires defeating the Mistlands boss first.
-
Specific Area: Fortresses are always located away from the coasts. They are found between the inland lava fields, usually situated on the central islands of the Ashlands.
-
Quantity: Each world generates with exactly 20 Charred Fortresses.
-
Generation Notes: The eastern and western smaller islands in the Ashlands usually generate without a fortress. It is most efficient to search the central islands or land directly south of your spawn point to find them.
-
Travel Requirement: You need a Drakkar ship to reach the Ashlands.
Charred Fortress Layout and Dangers
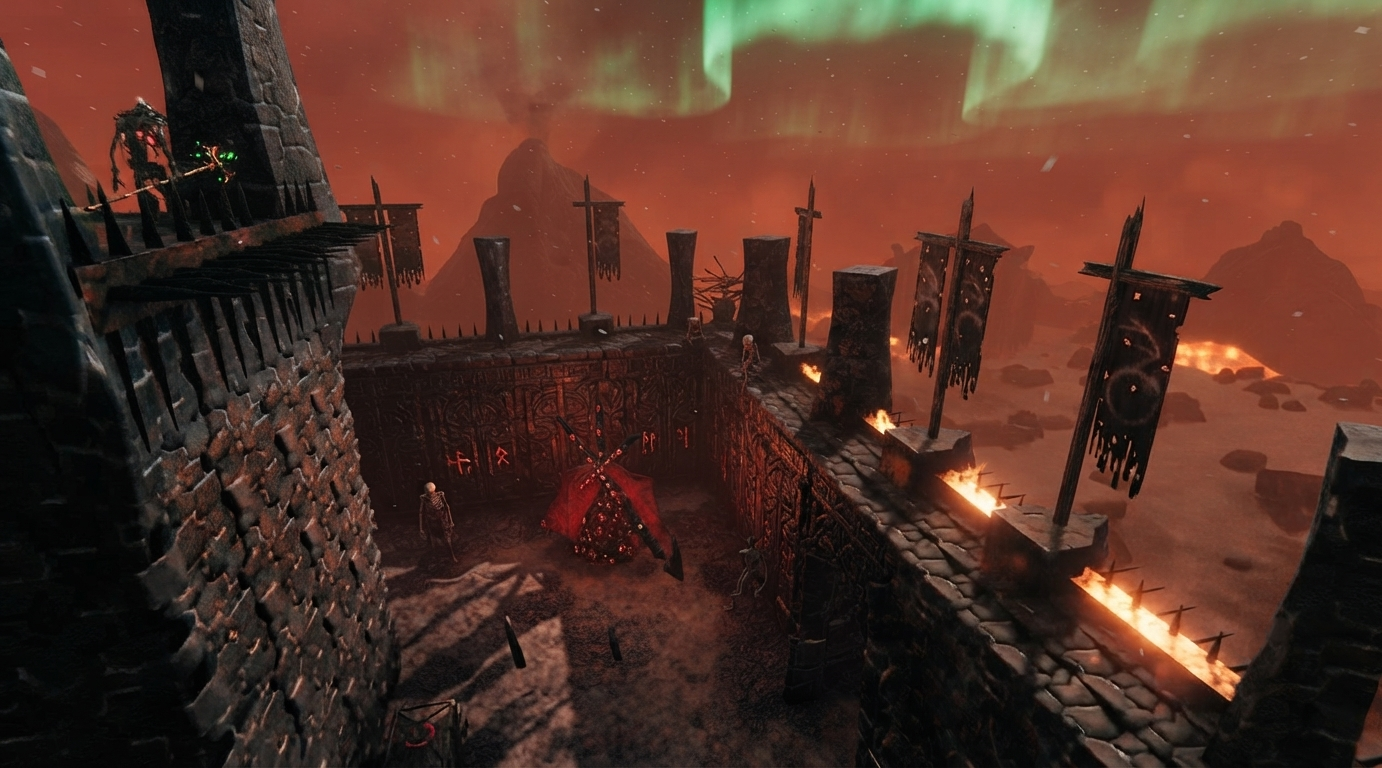
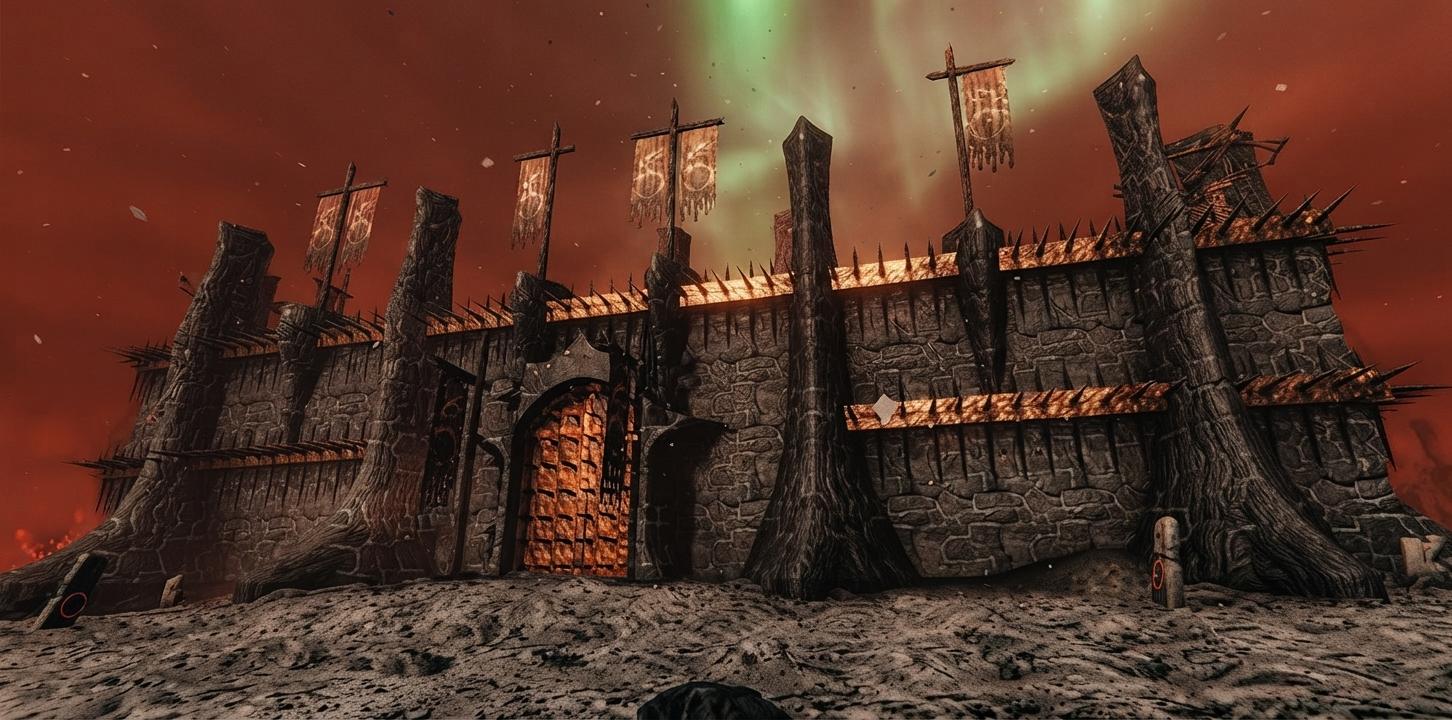
Once you arrive at the green beacon, you will see a massive structure, one of the key Ashlands locations for Bell Fragments. Be prepared for a difficult fight. The fortress is heavily defended by hostile mobs and physical barriers.
Structure Overview
-
Exterior: A tall, rectangular outer wall featuring many pillars and spiked bronze defenses.
-
Entrances: Two opposing outer walls have closed gates leading to the interior.
-
Interior Court: An open area littered with gravestones. Two Effigies of Malice are located in the corners. Two stone ramps lead up to the parapets on the exterior walls.
-
Central Tower: Located in the very center of the interior. It is a tall tower capped with spiked defenses and has a single gate leading inside. The Bell Altar is located inside this central tower.
Enemy Threats
The fortress spawns dangerous enemies upon your arrival and can also draw in other hostile creatures nearby. These enemies do not respawn if killed, but the initial spawn is lethal.
-
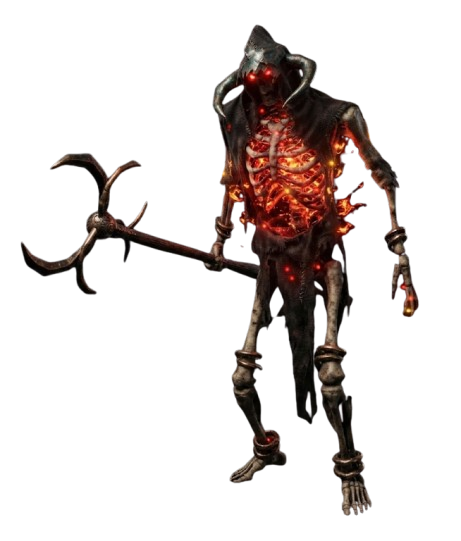
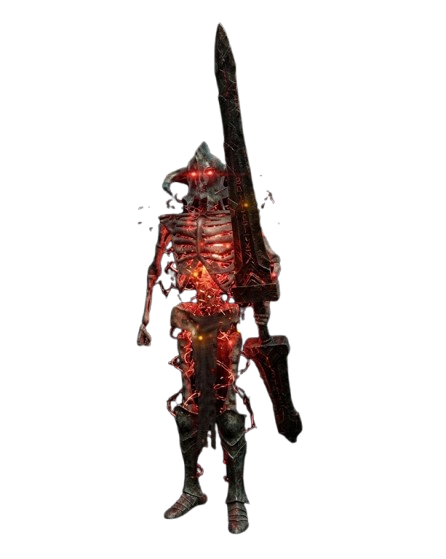
Charred Warlocks: Up to 3 can spawn. One is guaranteed (100% chance) to be on top of the central tower. Others have a 60% spawn chance.
-
Charred Marksmen: Up to 5 can spawn. One is guaranteed (100% chance) to be on top of the central tower. Others have a 60% spawn chance.
-
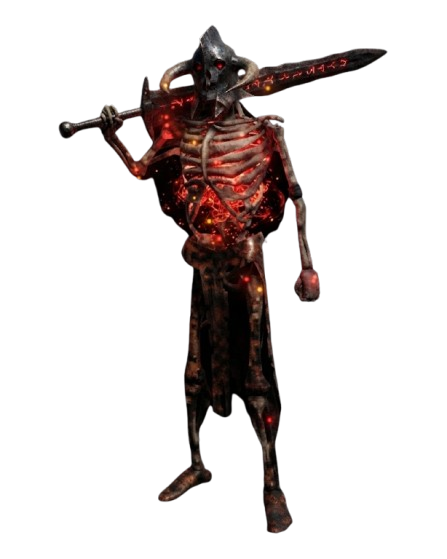
Charred Warriors: May also be close to the fortress, so watch for extra pressure while clearing the area.
-
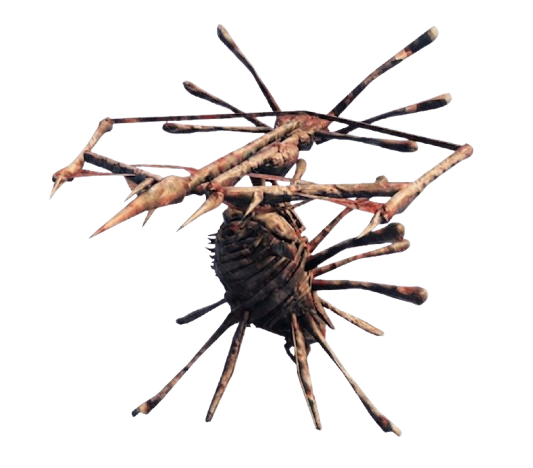
Skuggs: Up to 4 can spawn. There is an 80% chance for one to spawn in each corner of the fortress.
Defensive Structures
The fortress is designed to keep players out.
-
Spike Strips: The walls and towers are lined with spiked bronze defenses.
-
Gates: The gates are closed and heavily fortified.
-
Walls: The exterior walls are three layers thick. The interior tower walls are one layer thick.
Durability of Structures
| Structure | Health | Notes |
|---|---|---|
| Pillars | 1 | Negligible |
| Walls and Spikes | 1500 | Three layers thick on exterior walls |
| Gates | 6000 | Heavily fortified |
| Interior Tower | 1500 | Easiest to destroy if you can reach them |
How to Enter the Fortress
You have several options for entering the fortress, though some are more resource-intensive than others.
Destroying Walls and Gates (Siege Tools)
You can break through the defenses, but standard weapons will not work.
-
Required Tool Tier: You need Pickaxe damage of Tool Tier 5 or higher.
-
Recommended Tools: Battering Ram or Catapult with Explosive payloads.
-
Strategy: The exterior walls are three layers thick (4500 total health per section), which is actually easier to break through than the single gate (6000 health). However, the interior tower walls (1500 health) are the easiest to destroy if you can reach them.
Bug Note: Some segments of the walls may be mined with any pickaxe due to a generation bug, but do not rely on this. Digging under the central tower can be a waste if you hit the depth limit.
Ladders and Terrain (Recommended)
It is often easier to bypass the gates entirely.
-
Wooden Ladders: Build a wooden ladder to climb over the exterior walls. This avoids the need to destroy the high-health gates.
-
Natural Rocks: In some world generations, giant rocks spawn near the fortress. You can use these rocks as a bridge to get inside or onto the walls.
-
Digging Under: You can attempt to dig a hole under the central tower walls with a pickaxe to pass below them. This may fail if you hit the ground depth limit.
Remote Elimination
-
Bow/Crossbow/Magic: You can destroy Skuggs and other enemies from outside the fortress walls if you have a clear line of sight.
-
Spawner Destruction: From a high enough vantage point (such as the top of the exterior walls), you can destroy enemy spawners without entering the inner courtyard.
Locating and Extracting Bell Fragments
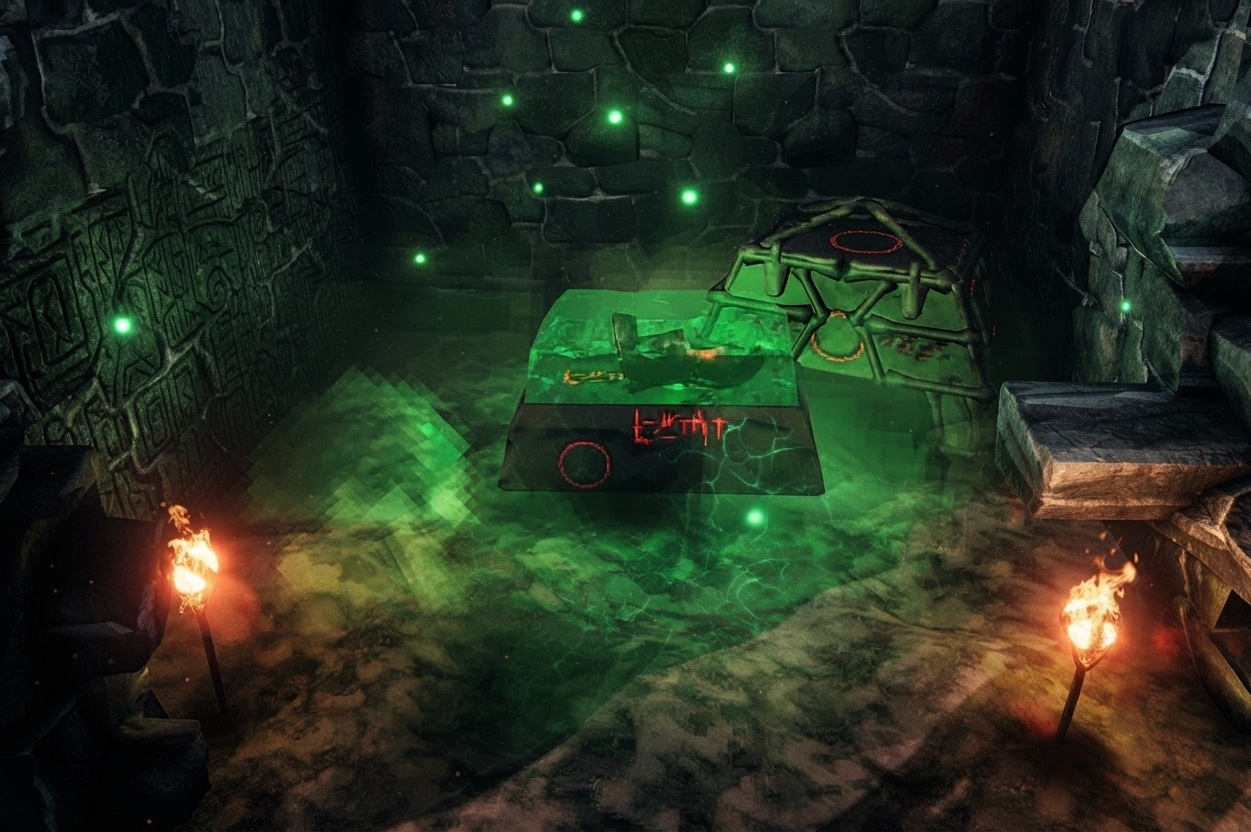
Once you have secured the area and eliminated the threats, you must locate the Bell Fragments.
The Bell Altar
-
Location: Inside the central tower.
-
Visual Indicator: The huge vertical beacon of light you saw from afar comes from this altar.
-
Fragility: The Bell Altar is extremely fragile. It has only 10 Health and no damage resistances.
-
It can be destroyed by any damage type.
-
Loot: Destroying the altar drops 2 to 4 Bell Fragments. Each fragment goes toward crafting one Bell, and you need three bell fragments per Bell.
Warning: Be careful not to accidentally destroy the altar while fighting near it or destroying the tower walls. If the altar is destroyed prematurely, you may lose the opportunity to collect the fragments safely or the beacon will vanish.
Additional Loot in the Central Tower
While you are in the central tower to get the fragments, check for other valuable Ashlands resources that can also help unlock progression or a crafting recipe:
-
Charred Chest: Contains Iolite, Bloodstone, Jade, Proustite Powder, and other tower loot. (200 Health, resistant to most damage except Lightning, Poison, and Spirit).
-
Fader Vegvisir: 50% chance to spawn. This reveals Fader's location on your map. That makes it easier when you later summon Fader.
-
Molten Cores: 2 are guaranteed to spawn in the central tower.
Additional Loot in the Fortress
-
Molten Cores: Up to 8 additional cores can spawn in the interior court (5% chance each).
-
Charred Chests: Up to 3 chests can spawn along the solid walls of the tower.
- Clockwise from the tower entrance: 100% chance, 13% chance, and 50% chance.
-
Scrap Bronze: The bronze spike strips on the walls can be destroyed to drop 2-5 Scrap Bronze each. A single fortress contains exactly 78 spike strips, yielding an average of 273 Scrap Bronze. This is a massive source of bronze if you clear the entire perimeter.
-
Charred Cogwheels: Dropped by Skuggs. These are required to build a Catapult.
A fortress can also point you toward other nearby Ashlands locations. Putrid Hole is another dangerous Ashlands point of interest. The Tomb of Lord Reto is another notable Ashlands objective for progression and exploration.
Recommended Strategy for Conquest
Conquering a Charred Fortress is dangerous, and gathering Bell Fragments here helps set up the later Ashlands boss encounter.
Preparation
Do not attempt to assault the fortress directly with melee combat initially. The number of Charred Warlocks and Marksmen makes this suicidal. Bell Fragments matter because they let you begin the process to summon Fader once you have enough crafted Bells.
The Trollstav Method
-
Master one Charred Fortress first (using extreme caution or the methods below) to obtain a Bloodstone from the chest.
-
Craft the Trollstav.
-
Return to a fortress (or approach a new one) and use the Trollstav to summon Trolls from a safe distance outside the walls.
-
The summoned Trolls will attack the fortress defenses and enemies. They can handle the vast majority of the threats without you risking your life.
-
Once the Trolls have cleared the enemies and potentially damaged the structures, finish off any survivors and collect the loot.
Alternative: Wall Running
-
Build a ladder to get on top of the exterior walls.
-
Run along the walls to kill enemies and destroy spawners from above.
-
If you get overwhelmed, jump off the wall to the outside (be careful of lava surrounding the area).
-
Once the area is clear, descend and loot the central tower.
If you plan on fighting Fader later, learning to deal with ranged pressure here helps more than relying on close melee. The following attacks are the main threats in that fight: meteors, flame breath, and claw swipes. In practice, fighting Fader is easier once you know Fader's attacks and can handle them at range.
Important Notes for Players
Beacon Removal
- Beacon Removal: Destroying the Bell Altar removes the green beacon. If you plan to return to the location or mark it for other players, take screenshots or map coordinates before destroying the altar. Remember, one bell is not enough for the ritual.
Base Building
- Base Building: If you conquer a fortress but do not destroy the walls or gates, the structure becomes an excellent location for a mini base. The walls are indestructible to normal mobs, and only flying enemies like Valkyries and Voltures can enter the courtyard. Your goal is to craft a three bell set for the summoning ritual.
Exiting the Tower
- Exiting the Tower: If you enter the central tower through the roof (by going through the hole between the spikes), you may trap yourself. Ensure you have materials to build ladders/platforms to exit through the same hole or have a Portal ready to teleport out.
Teleportation
- Teleportation: Bell Fragments are teleportable. They are not a placeholder item, so store them for real progression crafting. You can build a portal near the fortress, secure the fragments, and teleport them to your base for safe storage or crafting.
Summary of Requirements
To successfully get Bell Fragments, you must:
-
Travel to the Valheim Ashlands biome, where only the Drakkar can survive the boiling water route in.
-
Locate the green beacon indicating a Charred Fortress.
-
Equip Tool Tier 5 tools (Battering Ram/Catapult) or prepare the Trollstav strategy.
-
Clear the fortress of Charred Warlocks, Marksmen, and Skuggs, and remove any nearby enemies before moving into the center.
-
Enter the central tower.
-
Destroy the Bell Altar to receive 2-4 Bell Fragments.
-
Repeat this process at multiple fortresses until you have at least 9 fragments.
This travel requirement is part of the Ashlands update. Once you have 9 fragments, you can craft 3 Bells at a Black Forge. These Bells are the key to summoning Fader, the 7th boss of Valheim, and once crafted you can summon him at his arena. The altar area is called the Emerald Flame, and the ritual uses bell stands.
To defeat Fader, place one bell on each stand and then prepare for the encounter. Meteors fall from the sky, flame breath covers the ground in fire, and some impacts leave green flames or flames behind. In close range, he lunges forward with its head and paws during attacks. Proceed with caution, as the Ashlands and its fortresses represent the pinnacle of danger in the game, and if you defeat Fader, you get the fader trophy for +300 carry weight and +10% movement speed.