Best Weapons in Palworld 1.0
Discover the best weapons in Palworld 1.0 and learn crafting strategies to enhance your gameplay. Read our complete guide for tips and tricks!

Shahrukh Sial is a Gaming Content Strategist at Sparked Host. He identifies his own strategic outlines through deep research to cover game guides, tips, and updates that help players improve their skills and enjoy a better gaming experience.
If you’re searching for the best weapons in Palworld 1.0, this comprehensive guide is designed for you. Here, we cover both new and legacy weapons available in the official 1.0 release, helping players seeking optimal weapons for every stage of the game. Weapon choice is more important than ever in the new update, as Palworld 1.0 raises the player level cap, introduces 72 new Pals, and adds 13 new weapons to craft, fundamentally reshaping combat and progression. Whether you’re a fresh-save player or an endgame veteran, understanding the best weapons in Palworld 1.0 is crucial for efficient boss clears, resource management, and adapting to the expanded meta.
Weapon effectiveness in Palworld is determined by your playstyle and combat approach. Some weapons excel in crowd control, others in single-target damage, and your preferred combat style will influence which tools are best for you. To craft these weapons, you must first unlock their blueprints through the Technology board.
This ranking guide breaks down the best new and legacy weapons in Palworld 1.0, their exact material recipes from the Technology board, what each one does best, and how to build a stronger endgame loadout.
Top Weapons in Palworld 1.0: Quick Reference
Palworld 1.0 adds 13 new weapons to the game, expanding your arsenal with powerful energy arms and advanced firearms. Top weapons in Palworld 1.0 include the Laser Sword and Prototype Shotgun, alongside heavy hitters like the Beam Launcher and Plasma Rifle.
| Weapon Name | Type | Tier | Notable Feature |
|---|---|---|---|
| Beam Launcher | Energy Heavy Weapon | S-Tier | Massive area explosion |
| Plasma Rifle | Energy Rifle | S-Tier | Chains electrical arcs between targets |
| Drone Launcher | Energy Support | S-Tier | Deploys 9 autonomous drones |
| Laser Sword | Energy Melee | B-Tier | High-tech melee, no ammo required |
| Prototype Shotgun | Ballistic Shotgun | A-Tier | Devastating close-range burst |
| Heavy Assault Rifle | Ballistic Rifle | A-Tier | Sustained single-target DPS |
S-Tier: Endgame Paloxite Energy Weapons
These high-tech energy weapons dominate the absolute peak of the 1.0 progression line. They require high-end, late-game materials like Paloxite Ingots and rare Ancient Civilization Cores sourced from endgame mining and high-level dungeon loops.
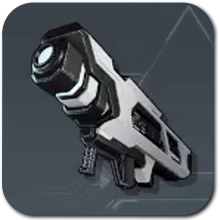
Beam Launcher
-
Role: High-density explosive devastation.
-
Crafting Recipe: Paloxite Ingot x100, Bio Battery x50, AI Core x10, Ancient Civilization Core x10
-
Why it's the Strongest: Sitting near the top end of the new cap, this is the ultimate heavy weapon in the 1.0 meta. It fires a single, high-density energy beam that detonates in a massive, large-area explosion. Its raw destructive power clears out crowded lines of enemies faster than any other option.
-
Best Against: Base raids, heavily packed enemy groups, and slow-moving elite targets.
Plasma Rifle
-
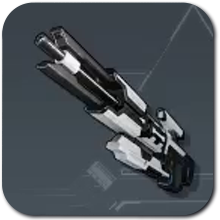
Role: Multi-target electrical suppression.
-
Crafting Recipe: Paloxite Ingot x80, Bio Battery x50, AI Core x8, Ancient Civilization Core x7
-
Why it's the Strongest: This weapon is the premier tool for fighting tight packs of enemies simultaneously. Upon impact, the Plasma Rifle releases electrical arcs that automatically jump and chain between multiple nearby targets, melting down whole groups without requiring pinpoint manual aim.
-
Best Against: Crowded dungeon rooms, multi-target elite waves, and fast packs.
Drone Launcher

-
Role: Autonomous combat support.
-
Crafting Recipe: Paloxite Ingot x70, World Tree Holy Water x40, AI Core x8, Ancient Civilization Core x5
-
Why it's the Strongest: The ultimate quality-of-life gun for intense, chaotic arenas. It deploys up to nine autonomous combat drones simultaneously to fight right alongside you. Because it utilizes World Tree Holy Water, it ties your arsenal directly to the new World Tree zone content.
-
Best Against: High-mobility bosses, aerial enemies, and hands-free solo pressure.
Beam Scatter
-
Role: Devastating close-quarters energy shotgun.
-
Crafting Recipe: Paloxite Ingot x50, Soralite Ingot x50, AI Core x5, Ancient Civilization Core x5
-
Why it's the Strongest: Compresses energy into a shotgun-style blast for massive damage at close range.
S-Tier Core Summary Checklist
-
Beam Launcher: Top-end destructive energy weapon firing a beam that triggers massive-area explosions.
-
Plasma Rifle: Hit-scan energy rifle that releases chaining electrical arcs to shock multiple grouped targets.
-
Drone Launcher: Automated proxy support system deploying 9 independent drones to create a constant second front.
-
Beam Scatter: Shotgun-style energy weapon for devastating close-quarters burst.
Next, we look at the top-performing conventional firearms in the A-Tier.
A-Tier: High-Efficiency Soralite Firearms
Sitting right between the early starter items and the endgame energy family, these late-game conventional workhorses will carry most of your toughest endgame fights. They require serious grinding for Soralite Ingots and Carbon Fiber.
Heavy Assault Rifle
-
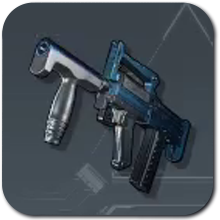
Role: Sustained mid-range DPS.
-
Crafting Recipe: Soralite Ingot x100, Carbon Fiber x50, Bio Battery x30, AI Core x5
-
Why it's the Strongest: This is the single heaviest investment in the mid-tier firearm range. The steep material cost reflects its premium performance. It is your absolute best, most reliable single-target damage option before you transition up into full Paloxite-tier weaponry.
-
Best Against: Single-target bosses, alpha creatures, and sustained mid-range encounters.
Tactical Grenade Launcher
-
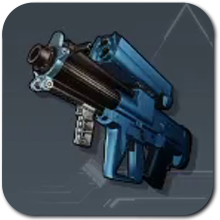
Role: Explosive area denial.
-
Crafting Recipe: Soralite Ingot x80, Corrosive Solvent x15, Thermal Core x5, AI Core x5
-
Why it's the Strongest: Built specifically to control space and clear groups, this tactical launcher allows you to rain down high-explosive area denial from extreme long distances, letting you bombard human outposts or base raids from absolute safety.
-
Best Against: Clustered human outposts, enemy base raid waves, and choking points.
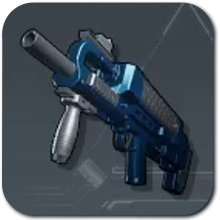
Prototype Shotgun
-
Role: Close-range burst.
-
Crafting Recipe: Soralite Ingot x60, Carbon Fiber x40, Thermal Core x5, AI Core x5
-
Why it's the Strongest: Delivers immense, high-impact close-range burst damage to stop charging monsters.
-
Best Against: Aggressive charging targets, fast dungeon clearing, and short-range defense.
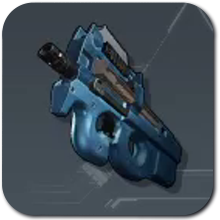
Combat SMG
-
Role: Suppressive fire.
-
Crafting Recipe: Soralite Ingot x50, Carbon Fiber x30, Cryogenic Coolant x20, AI Core x4
-
Why it's the Strongest: Features an enlarged magazine size designed to lay down rapid, continuous suppressive fire during fast-paced skirmishes.
-
Best Against: Fast dungeon clearing, short-range defense, and suppressing groups.
Enhanced Lily's Spear
-
Role: Melee bridge weapon.
-
Crafting Recipe: Paldium Fragment x20, Soralite Ingot x30, High-Quality Cloth x20, High-Quality Wooden Board x20
-
Why it's the Strongest: Bridges the mid-to-late gap for melee users.
A-Tier Core Summary Checklist
-
Heavy Assault Rifle: High-investment ballistic rifle delivering the best sustained single-target damage prior to Paloxite tiers.
-
Tactical Grenade Launcher: ARCH-trajectory explosive weapon ideal for raining area denial onto outposts from safety.
-
Prototype Shotgun: Devastating close-range burst for stopping aggressive targets.
-
Combat SMG: Large-magazine suppressive fire for fast-paced skirmishes.
-
Enhanced Lily's Spear: Late-game melee option for those preferring close combat.
Moving on, let’s explore the best progression and utility weapons in the B-Tier.
B-Tier: Progression and Utility Essentials
These options are perfect for starting a fresh 1.0 save file, saving your expensive endgame materials, or managing specific mechanical utility.
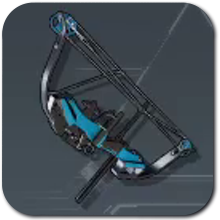
Mechanical Bow
-
Role: Long-range precision and penetration.
-
Crafting Recipe: Soralite Ingot x40, Carbon Fiber x40, Paldium Fragment x200, AI Core x3
-
Why it's the Strongest: This bow stands out for requiring a massive 200 Paldium Fragments. However, because it uses common base materials, it serves as an incredibly accessible late-game option that lets you strike targets with high projectile velocity and deep armor penetration without burning rare cores.
-
Best Against: Distant targets, lone camp guards, and high-accuracy opening shots.
Laser Sword

-
Role: High-tech energy melee.
-
Crafting Recipe: Soralite Ingot x50, Paldium Fragment x250, Bio Battery x30, AI Core x3
-
Why it's the Strongest: The pinnacle of the melee family. It cuts through targets with pure energy output. While it demands Soralite, its biggest tactical advantage is that it requires zero ammunition to use, making it a perfect zero-cost pocket backup weapon.
-
Best Against: Ammo conservation, close-quarters combat, and clearing weak targets.
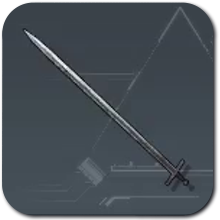
Primitive Sword
-
Role: Starter blade melee upgrade.
-
Crafting Recipe: Wooden Board x2, Stone x15, Ingot x15
-
Why it's the Strongest: If you are starting a fresh 1.0 save, the Primitive Sword is your very first meaningful melee upgrade over your fists, available almost immediately for negligible costs.
-
Best Against: Early-game progression, fresh-save map exploration, and saving early gunpowder.
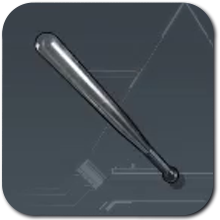
Metal Bat
-
Role: Blunt melee upgrade.
-
Crafting Recipe: Hardwood x30, Refined Ingot x20
-
Why it's the Strongest: The Metal Bat steps up the investment in the mid-game, providing a heavier blunt-damage option that bridges your tech progression.
-
Best Against: Early-game progression, fresh-save map exploration, and saving early gunpowder.
B-Tier Core Summary Checklist
-
Mechanical Bow: High-velocity sniper bow that trades a slower fire rate for excellent armor penetration.
-
Laser Sword: High-tech energy sword built to cut through targets while saving 100 percent of your ammo stocks.
-
Primitive Sword / Metal Bat: Highly accessible early and mid-game melee tools built from basic wood, stone, and ingots.
-
Extra Weapon Holster: The Extra Weapon Holster lets you carry up to six weapons at once, expanding your inventory beyond the default four.
Now that you know the best progression and utility weapons, let’s look at how to dominate aerial combat and manage your resources.
Aerial Combat and the Wing Pack Extension

Palworld 1.0 introduces the Wing Pack, an innovative utility item that changes how you approach vertical map layouts and airborne skirmishes.
-
Dedicated Equipment Slot: The Wing Pack is a glider replacement that sits inside a dedicated gear equipment slot rather than hogging a valuable slot in your five-Pal active party.
-
Airborne Weapon Capabilities: While gliders traditionally lock you out of your items, the Wing Pack allows you to engage in high-velocity aerial combat. You can freely launch one-handed firearms, toss Pal Spheres, or fire the Grappling Gun seamlessly while maintaining airborne momentum.
-
Sky Island Navigation: This vertical mobility framework is practically required kit for exploring the treacherous terrain and high vertical dungeon rooms scattered across the newly added Sky Island biome.
Practical Crafting and Management Tips
Resource Management
- Stockpile Core Drops Early: The Beam Launcher and Plasma Rifle require Ancient Civilization Cores and AI Cores in large quantities. These are rare dungeon and boss drops, so stock up on them completely before committing to a high-tier craft.
Weapon Selection Tips
- Match the Weapon to the Room: The Plasma Rifle's chaining arcs and the Drone Launcher's swarm are built to shine inside crowded dungeon rooms. Always swap to a hard-hitting single-target gun like the Heavy Assault Rifle when focusing down a lone boss.
Technology Point Allocation
- Spend Points Wisely: Always spend your Technology Points on weapons that match your current resource availability. Unlocking the Level 78 Beam Launcher blueprint doesn't help you if you are still stuck farming basic Soralite Ingots.
Conclusion
The release of Palworld 1.0 completely shifts the baseline meta by giving both fresh-save players and hardcore endgame veterans more tactical flexibility. By restructuring weapon unlock paths from Level 17 all the way to Level 80, the game requires you to carefully balance your tech point distribution alongside your ongoing resource management. Ballistic options like the Heavy Assault Rifle maintain a prominent place for efficient single-target fights, but the high-tech Paloxite energy family, led by the devastating Beam Launcher, remains unrivaled for endgame area destruction.
To truly optimize your combat performance under the expanded level cap, you must adapt to the newly added structural systems. Prioritize crafting the Extra Weapon Holster early to comfortably hot swap between six active gear options and integrate the Wing Pack to rule aerial engagements over the Sky Island. Once you secure a steady automated pipeline of Soralite Ingots, AI Cores, and Ancient Civilization Cores, your armory will be perfectly equipped to shred through any challenge 1.0 throws your way.