How To Make An Armor Stand In Minecraft
Learn how to craft an armor stand in Minecraft, including the recipe, required materials, and how to use it to display your gear in style.

Shahrukh Sial is a Gaming Content Strategist at Sparked Host. He identifies his own strategic outlines through deep research to cover game guides, tips, and updates that help players improve their skills and enjoy a better gaming experience.
Do you have cool armor in Minecraft and want to show it off? Or maybe you want a friendly helper to hold some items? That's what an armor stand is for! It's like a display dummy for your gear. This guide will teach you how to make an armor stand in Minecraft.
When Were Armor Stands Added To Minecraft?
Armor stands were added armor stands to Minecraft Java Edition on August 6, 2014, with update 1.8. They were also added armor to Bedrock Edition on September 20, 2017, in version 1.2.0. In Java Edition, they first appeared in a test version called 14w32a.
Armor Stand Crafting Recipe
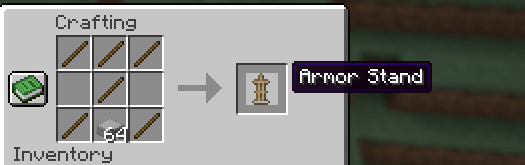
To craft an armor stand in Minecraft, you need a special armor stand crafting recipe. You will need one smooth stone slab and six sticks.
Here's how to make armor stand in Minecraft:
-
Get your materials: You need six sticks and one smooth stone slab.
-
Open the crafting table: Go to a crafting table. You'll see a 3x3 grid.
-
Place the smooth stone slab: Put the smooth stone slab in the very middle spot of the bottom row.
-
Surround with sticks:
-
Put sticks in all three spots of the top row.
-
Put a stick in the middle spot of the middle row.
-
Put sticks in the left and right spots of the bottom row, next to your stone slab.
-
-
Collect the armor stand: The finished armor stand will appear. Take it and put it in your bag (inventory). This armor stand item is now yours.
Placing An Armor Stand
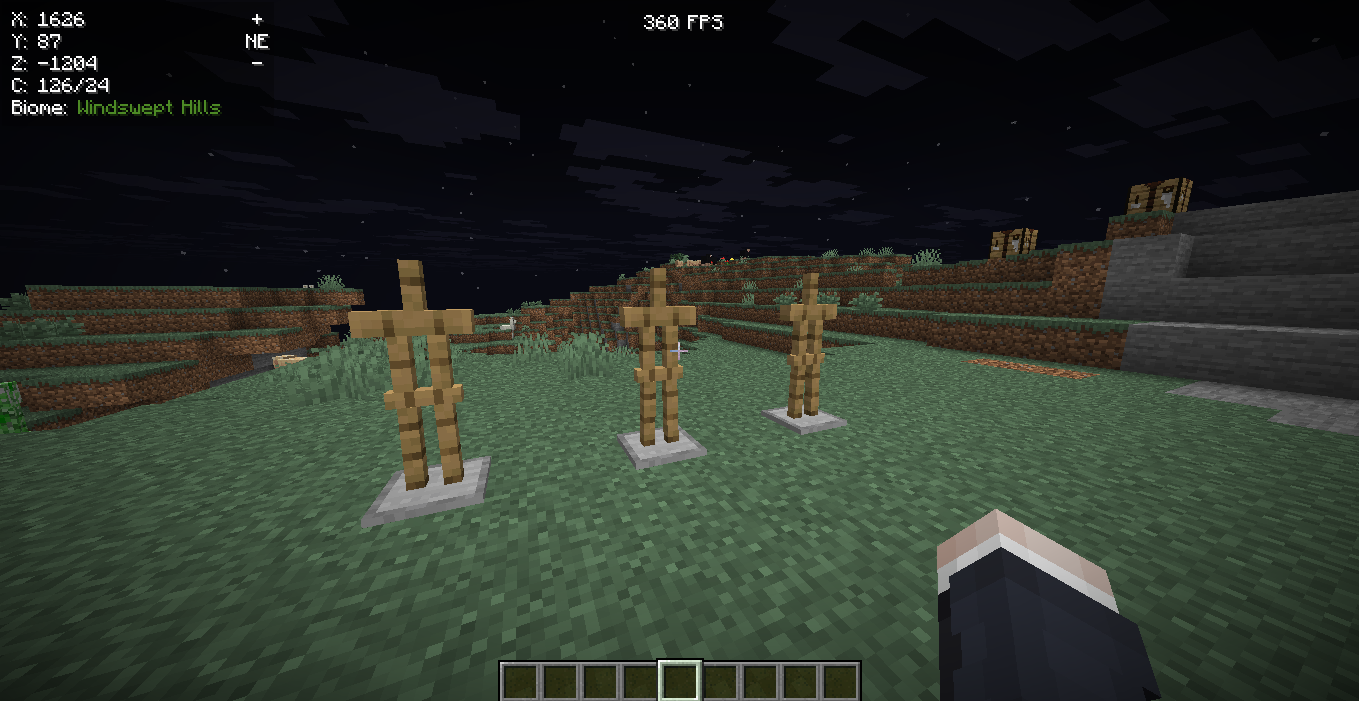
To place an armor stand in Minecraft, you need to hold it and click where you want it to go.
-
Pick the Armor Stand: Make sure the armor stand is in your hand (selected in your hotbar).
-
Right-Click: Point to where you want the armor stand to be and right-click your mouse (or tap if on mobile devices).
-
Different ways to place armor stands: You can place armor stands straight or at a diagonal. If you stand across from the block, the armor stand can be placed at an angle, facing your player's facing direction.
-
How armor stands move: Armor stands are like living entities. This means water, pistons, or even being hit can make them move. If an armor stand falls from a height, it will obey gravity.
Features and Uses of an Armor Stand
-
Armor and Items: An armor stand can holds armor enchanted and a full set of armor. Armor stands can also hold mob heads, carved pumpkins, special wings called elytra, and other items. If the armor stand has wooden arms, it can hold blocks too. The armor stand's hands can hold things. A dual wielding armor stand can hold items in both hands.
-
Posing: In Minecraft: Bedrock Edition, you can make an armor stand change its pose. You can also make it change its armor stand poses using redstone.
-
Entity Behavior: Armor stands are living entities. Armor stands can be moved by water or pushed by pistons.
-
Orientations: You can place armor stands in many directions for cool displays.
Removing An Armor Stand
To remove an armor stand in Minecraft, you simply hit it. Just hit the armor stand until it breaks. When an armor stand is destroyed, it will drop itself as an item. If armor stand held armor or items, those will also drop. The stand drops its items and itself. If a destroyed mob or destroyed entity broke it, armor stand will still drop its items. If you attack armor stands too much, they will break. Don't worry, they don't make a player death sound.
How To Put Armor On Armor Stands In Minecraft
To put armor on an armor stand in Minecraft, it's very simple.
-
Get Armor: First, get the armor pieces you want to put on the armor stand.
-
Go to the Armor Stand: Stand close to the armor stand.
-
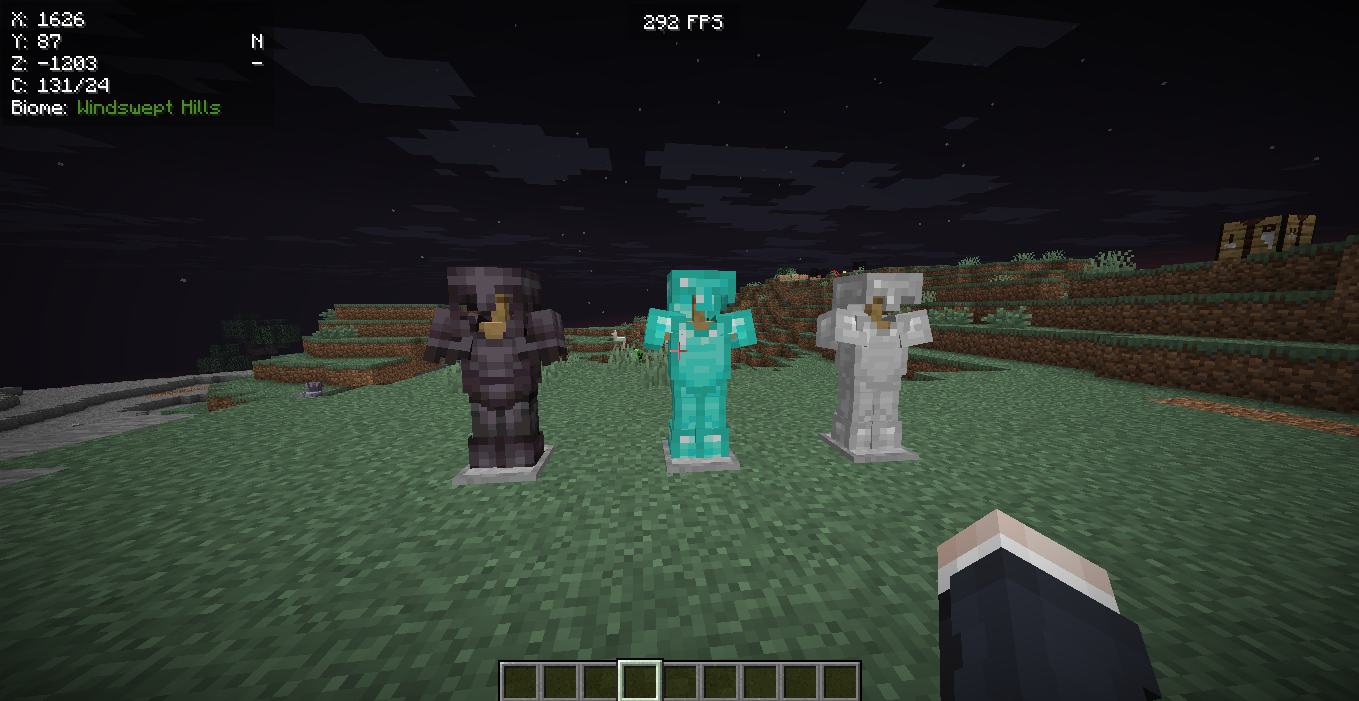
Put on Armor: Right-click (or tap on mobile devices) on the armor stand while you are holding the armor piece. The armor will go right onto the armor stand in the right spot (like a helmet item on its head). This is how added armor works.
-
Repeat: Do this for each piece of armor you want to put on.
-
Shift-Clicking: On Java Edition, you can also sneak (shift-click) on an empty armor stand to put all your current armor on it at once. Or, sneak-click a full armor stand to try to put its armor on yourself.
How To Pose Armor Stands
In Minecraft: Bedrock Edition, you can make armor stands change how they stand.
Bedrock Edition:
-
Sneak and Interact: While sneaking (crouching), right-click or tap the armor stand. It will change its pose each time you do this. You can cycle through many poses, including an honor pose.
-
Redstone: You can also use a redstone signal to make the armor stand change its pose. This uses its namespace id redstone power.
Java Edition:
In Java Edition, changing poses is a bit more tricky. You need to use special commands.
-
Commands: You'll need to type commands to change how armor stands stand in Java Edition.
-
/data merge entity Command: The command /data merge entity <entity ID> {Pose:{
:[ , , ]}} can change how specific parts of the armor stand move. <entity ID> means the special number for that armor stand. -
Limb Names:
means a part like LeftArm (for the left arm specific rotations) and RightArm (for the right arm specific rotations), RightLeg (for right leg specific rotations) and LeftLeg (for the left leg specific rotations), Head (for head specific rotations), or Body (body specific rotations). -
Rotation Values:
, , and are numbers that tell the part how to turn (in degrees). For example, 0f, 45f, -90f. This is for arm rotations or leg rotations. -
Example: The command /data merge entity @e[type=armor_stand,limit=1 ,sort=nearest] {Pose:{RightArm:[-45f,0f,0f]}} will turn the right arm forward by 45 degrees for the nearest armor stand. This is how you make an armor stand's hands move, or even make it appear tilted slightly. You can create very specific poses, even extreme metadata variants.
Conclusion
Armor stands are a fantastic way to display your armor and other items in Minecraft! Now you know how to make armor stand in Minecraft, how to put your cool enchanted armor on them, and even how to make them strike different honor poses.
Whether you're in Java Edition or Bedrock Edition, these living entities are super useful for decorating your base or showing off your latest enchanted armor. You can have them dual wield items, wear mob heads or carved pumpkins, or even hold stained glass that is dyed properly.
No need to worry if an armor stand gets destroyed mob or if it just obey gravity and armor stand falls, you can always make a new armor stand and collect its drops.