How To Breed Villagers In Minecraft
Find out how to breed villagers in Minecraft with our easy guide. Learn the requirements, best setups, and tips to grow your village fast.

Shahrukh Sial is a Gaming Content Strategist at Sparked Host. He identifies his own strategic outlines through deep research to cover game guides, tips, and updates that help players improve their skills and enjoy a better gaming experience.
Ever wished you could have your own little bustling town in Minecraft, full of helpful villagers to trade with? Well, you can. Knowing how to breed villagers is a key skill for any player who wants to create a thriving community. Breeding villagers not only gives you more villagers to trade with but also helps you grow your world and protect your base with iron golems.
This guide will walk you through every step, from finding a village to setting up the perfect conditions for breeding. Get ready to become the mayor of your own thriving village.
How To Find A Village In Minecraft
Before you can start breeding, you first need to find some villagers. You can do this in three main ways.
Finding Villages Without External Help
Villages typically spawn in specific biomes, like Desert, Savanna, Taiga, and Plains biomes. These are usually dry, flat areas with buildings and iron golems for protection. Finding a village this way can be a long journey, so be prepared. Stock up on food, weapons, and a bed. Try to climb to the tallest hill you can find and look for signs of a village.
At night, you can spot the torches from a village much more easily. You can also use a tamed horse to explore faster.
Finding Villages Using An Online Tool
For players who don't want to use cheats but still want to find a village easily, you can use an online tool. The Chunkbase website and its Village Finder tool is a great option. It allows you to create a map of your world.
How to use this tool to find a village:
-
Find your world seed: In Minecraft, you can find your world's seed by enabling "Show Coordinates" in the game settings and checking your coordinates in the world. For Java Edition, you can also use the /seed command.
-
Go to Chunkbase: Navigate to the Chunkbase website.
-
Select the Village Finder: Click on the Seed Map option and then choose Village Finder.
-
Enter your seed and version: Input your world's seed and select the correct Minecraft version (Java or Bedrock).
-
Locate villages on the map: The map will display the locations of villages in your world.
-
Explore in-game: Go to the coordinates provided by Chunkbase in your Minecraft world to find the villages. This method is great for finding the closest village and getting to it without a long journey.
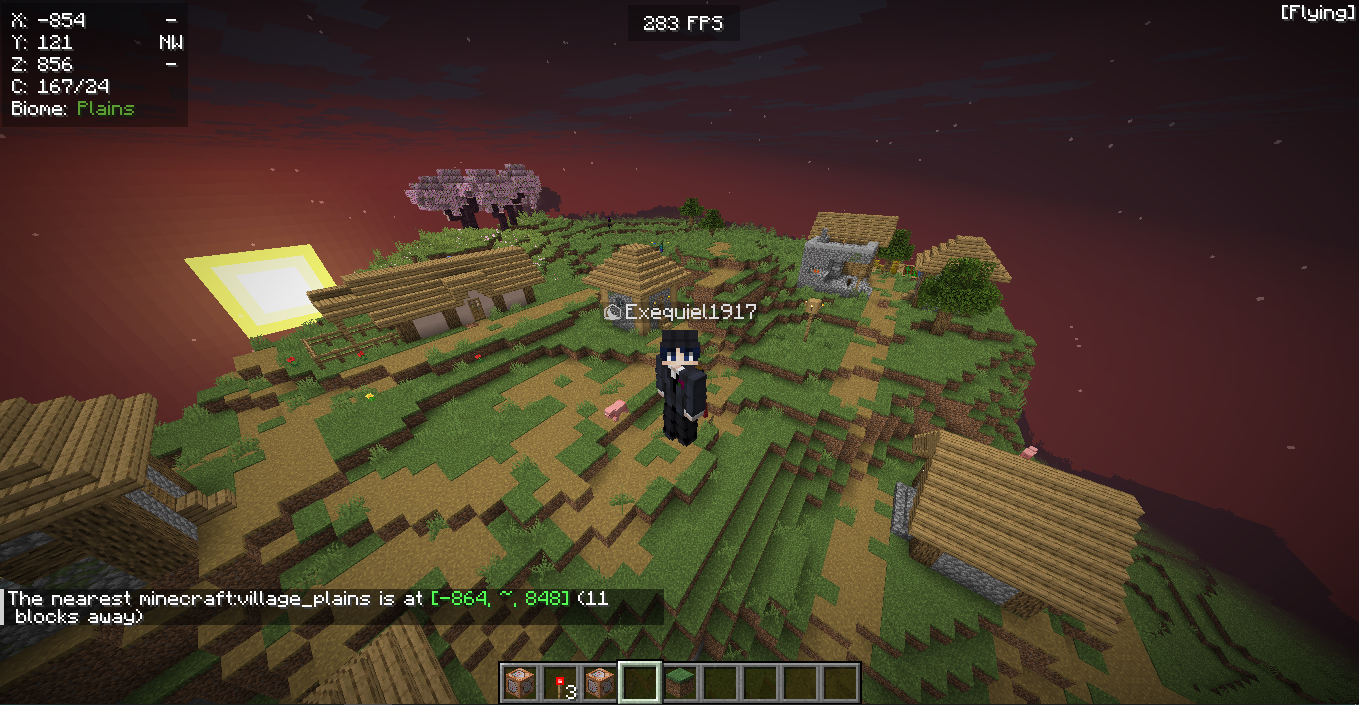
How To Teleport To A Village
If you have cheats enabled in your world, you can use a command to teleport directly to the nearest village. Open the chat window and type:
/locate structure minecraft:village_
The game will then give you the coordinates (X, Y, and Z) of the closest village.

You can then use another command to teleport there:
/tp X Y Z
This is a great option for players who want to jump right into the action.
How To Cure A Zombie Villager In Minecraft
One of the most rewarding things you can do in Minecraft is to cure a zombie villager. A zombie villager is a normal villager that has been attacked by a zombie and turned into a zombie villager. They behave just like a normal zombie, and they can attack you and other passive mobs.
You can save this same villager by curing it. The process is a bit complicated, but it's well worth the effort because a cured villager will offer you huge discounts on trades. In fact, a zombie villager that you cure will often give you the best player trades in the game. You'll need a brewing stand and some other things to start the curing process.
Step 1: Get the Materials
To cure a zombie villager, you'll need two main items:
-
A splash potion of Weakness.
-
A golden apple.
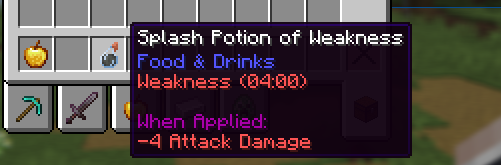
You can create a splash potion of Weakness at a brewing stand using a spider eye, a mushroom, and sugar to make a Potion of Weakness, and then throwing a gun powder into the brewing stand to turn it into a splash potion.
Getting a golden apple is a bit harder.
You can find a golden apple in chests in village structures, dungeons, and other generated structures, or craft one with a normal apple and eight gold ingots. The golden apple is a rare item, so be careful with it.
Step 2: Find a Zombie Villager
You can find a zombie villager in your new world in two ways:
-
A zombie villager can spawn naturally in your world, just like other mobs. You can find a zombie villager on a map if you are searching for mobs.
-
A normal villager can be attacked by a zombie and turn into a zombie villager. These zombie villagers can spawn inside a village at night. You can find a zombie villager inside a village house, so be extremely careful at night. The zombie villager will attack you on sight, so you need to be extremely careful when you are near one.
Step 3: Cure the Zombie Villager
Once you have your splash potion and golden apple, and you've secured the zombie villager, you can begin the curing process.
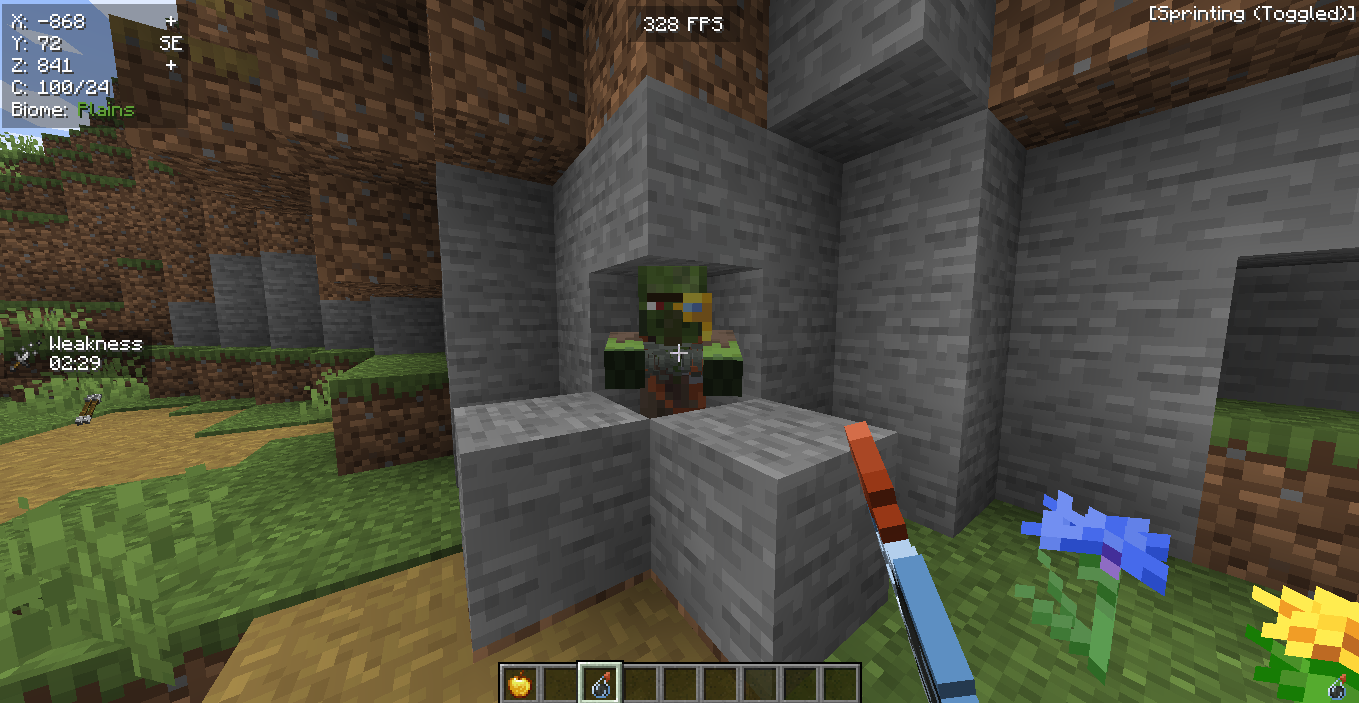
First, you need to throw the splash potion of Weakness at the zombie villager. You have to be careful when you throw the splash potion so you don't hit yourself. After you throw the splash potion, the zombie villager will have a weakness effect on them.
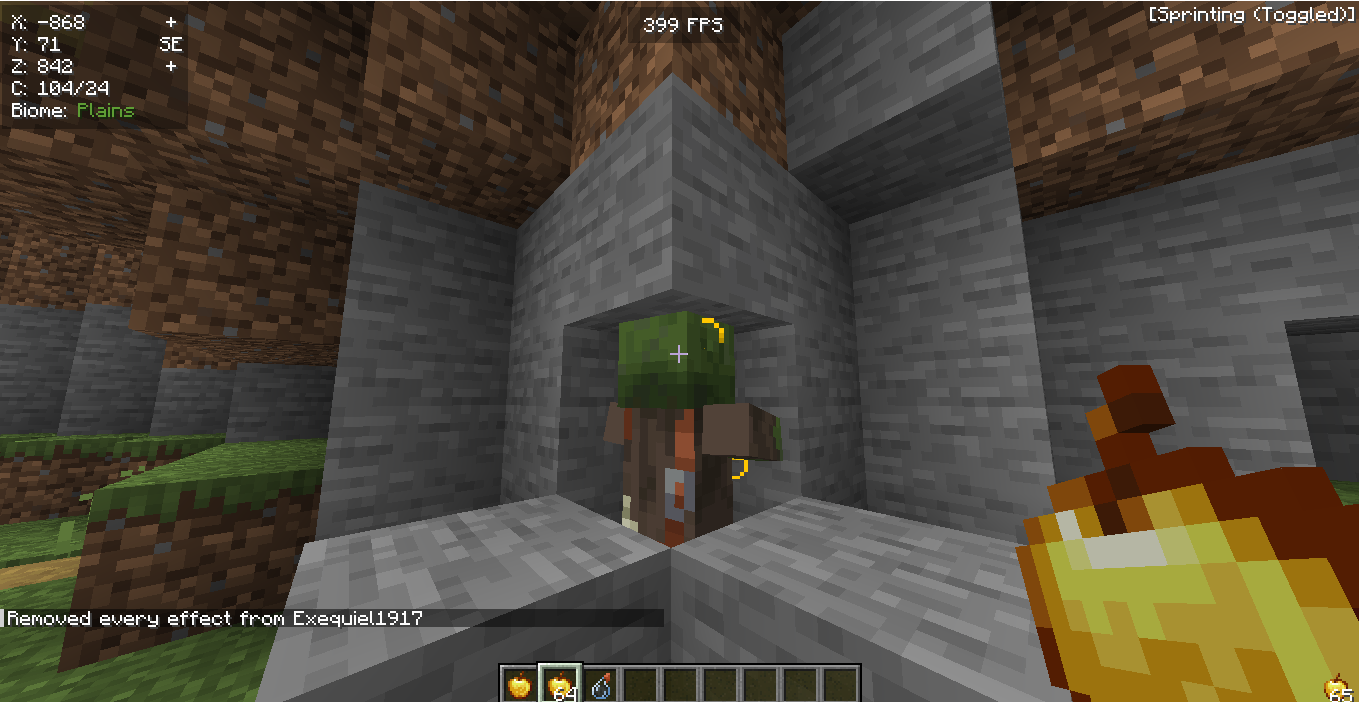
Next, use an empty hand to right-click on the zombie villager and feed it the golden apple. As you are feeding it, the zombie villager will make a weird sound, and its body will start shaking.
The curing process has begun. It takes about three to five minutes for the curing process to be completed. During this time, you need to be extremely careful to protect the zombie villager. Other hostile mobs, like other mobs or zombies, will see it as just another zombie and attack it. Other mobs can even attack your zombie villager, and the zombie villager can also die from fire, so you have to protect your zombie villager from all these things.
After the curing process is complete, you will have a cured villager, which is now a normal villagers with great trades.
How To Spawn Villagers In Minecraft
If you're in Creative Mode and don't want to go through the trouble of finding a village, you can simply use a spawn egg. Just select the villager spawn egg from your inventory and right-click on the ground to spawn a new villager.
In survival mode, the best way to get more villagers is by breeding.
To breed villagers, you need three things:
-
At least two villagers: You need two villagers to get the process started. They need to be willing to breed.
-
Plenty of beds: There must be at least three beds with a clear path to them in the village. The villagers will not breed if there are not enough available beds for them and the baby villagers.
-
Lots of food: Villagers need to be willing to breed. They become willing when they have enough food. You can give them bread, carrots, potatoes, or beetroot. The easiest way to provide food is to set up a small farm nearby and assign a farmer villager with a straw hat to it. The farmer villager will harvest crops and share food with the other villagers.
Once you have these three things, the villagers will eventually get to work and create a new baby villagers.
Conclusion
Knowing how to breed villagers is a valuable skill in Minecraft. Whether you find a village by exploring, using a map tool, or teleporting with a command, you have options. Once you have a couple of villagers, make sure they have a safe area with beds and plenty of food. In no time, you'll have a bustling community of baby villagers ready to grow up and help you build your perfect world.